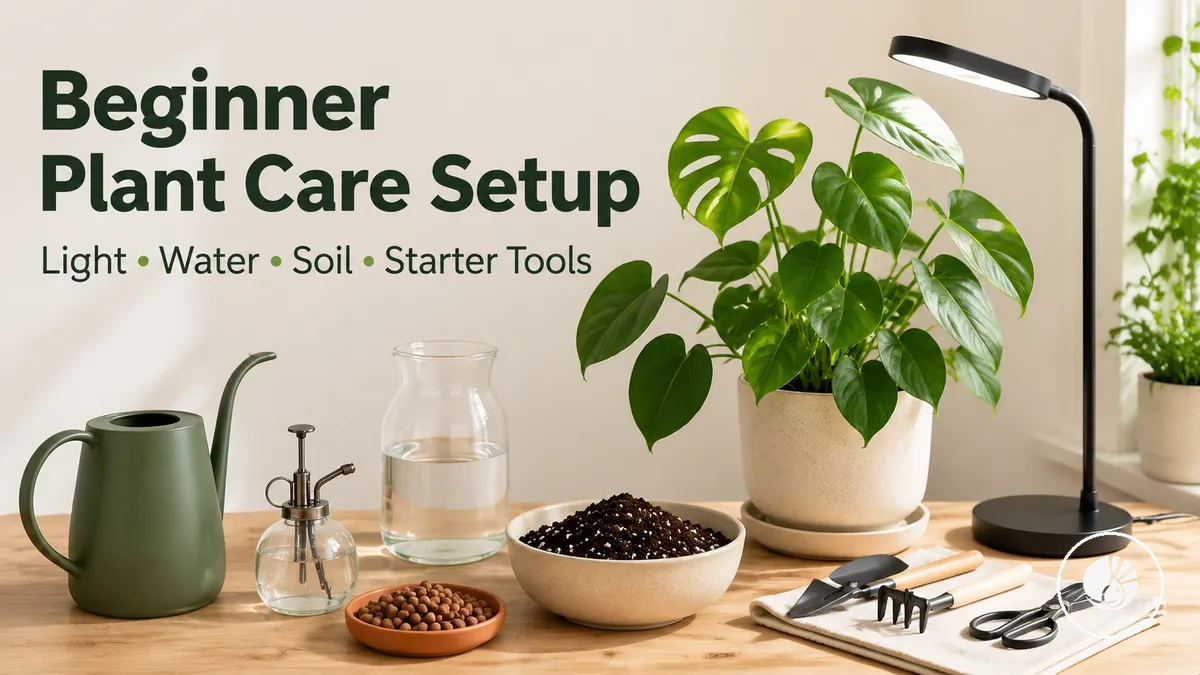
Beginner indoor tropical plant care setup
A beginner indoor tropical plant care setup is a simple starter system for choosing the basic supports that help a new plant owner manage light, water, humidity, and soil. The setup should match the plant’s needs with the room conditions before any tool list becomes useful. Starter tools can support care decisions, but plant response may still vary by placement, moisture, humidity, and soil behavior. This makes the beginner indoor tropical plant care setup a starter decision system.
The beginner setup stays narrower than a complete care system because the beginner setup focuses on the first care controls a beginner must understand. The setup helps the reader decide which starter tools are useful for observation, gradual adjustment, and care confidence without making products the main subject. This page sits inside the broader context of indoor tropical plant care solutions.
A new indoor tropical plant may sit near a window, dry out faster than expected, or respond slowly after a watering change. In that situation, the starter system should help the beginner observe conditions before changing the routine. A starter setup is not the same as a complete care-system expansion. The next decision is to understand the care controls a beginner must monitor before selecting tools.
Beginner care needs before selecting starter tools
Beginner care needs are the basic conditions that help an indoor tropical plant stay aligned with its environment before any tool is selected. Light, water, humidity, and soil are the main areas a beginner needs to observe because plant response often depends on how these conditions interact with room conditions. Together, these factors form the core care controls.
Starter tools are usually more useful when they support a specific care need rather than being chosen first. A tool can help clarify an observable condition, but the decision effect depends on what the plant and room conditions indicate over time. Understanding these relationships keeps tool selection focused on practical observations instead of assumptions. These care controls connect closely to the essential care parts.
Beginner care needs before selecting starter tools become easier to understand when each care need is linked to an observable condition. The visual labels below clarify how light availability, soil moisture, humidity stability, and pot drainage relate to tool support and decision-making.

- Light availability: Observe how much light reaches the plant. A light-check tool may help when placement decisions are unclear.
- Soil moisture: Observe whether soil stays dry or damp between watering checks. A moisture-check tool can support watering decisions when visual cues are uncertain.
- Humidity stability: Observe whether room conditions remain consistent or change noticeably. A humidity-measuring tool may help explain differences in plant response.
- Pot drainage: Observe how water moves through the pot and soil after watering. Drainage checks can help identify whether excess moisture may remain around roots.
- Plant response: Observe changes in leaf condition or overall appearance. These observations can guide whether tool support is needed or whether conditions need more time to stabilize.
Immediate care controls focus on light availability, soil moisture, humidity stability, and pot drainage because they influence early observations. Additional tools or upgrades can usually wait until the plant shows a clearer need through an observable condition and plant response.
Light, water, humidity and soil as the first care controls
Light, water, humidity, and soil are the practical care controls that determine which starter tools may be useful. Each care control has an observable attribute that creates a different beginner condition and decision. Together, these form the four controls.
The EAV mapping below connects each care control to an observable attribute, a beginner condition, and a tool implication. Read each row as a decision aid rather than a fixed rule because conditions may vary by room and plant response.
| Care control | Observable attribute | Beginner condition | Tool or routine implication |
|---|---|---|---|
| Light | Exposure near the plant | Plant response may differ between locations | Light checks can support placement criteria; see beginner light setup |
| Water | Soil moisture and drainage | Moisture may remain low or persist longer than expected | Watering decisions can follow observed conditions; see beginner watering setup |
| Humidity | Room condition around foliage | Humidity stability may change with indoor conditions | A humidity check can help interpret limitations in plant response |
| Soil | Pot drainage and moisture retention | Soil condition may influence water movement | Routine observation can help assess moisture and drainage balance |
Starter setup scope versus complete care-system scope
A starter setup focuses on immediate care decisions, while a complete care system addresses wider conditions that may appear over time. The starter setup supports observation and care confidence with basic tools, while a complete care system may include optional tools, environment controls, and greater maintenance depth. This difference defines starter scope.
The comparison below separates the decision burden of a starter setup from the broader scope of a complete care system. Readers who want to explore broader solution paths can compare care solutions by need, but the contrast below helps prevent overbuying.
| Starter setup scope | Complete care-system scope |
|---|---|
| Basic tools that support immediate care decisions | Optional tools may be added to address wider conditions |
| Focused monitoring of visible plant and room conditions | Greater monitoring depth when a repeated need becomes clear |
| Limited environment controls based on current observations | Additional environment controls may be useful when conditions justify them |
| Expansion follows plant response and clear escalation triggers | Expansion may occur when ongoing conditions support a reason for added maintenance depth |
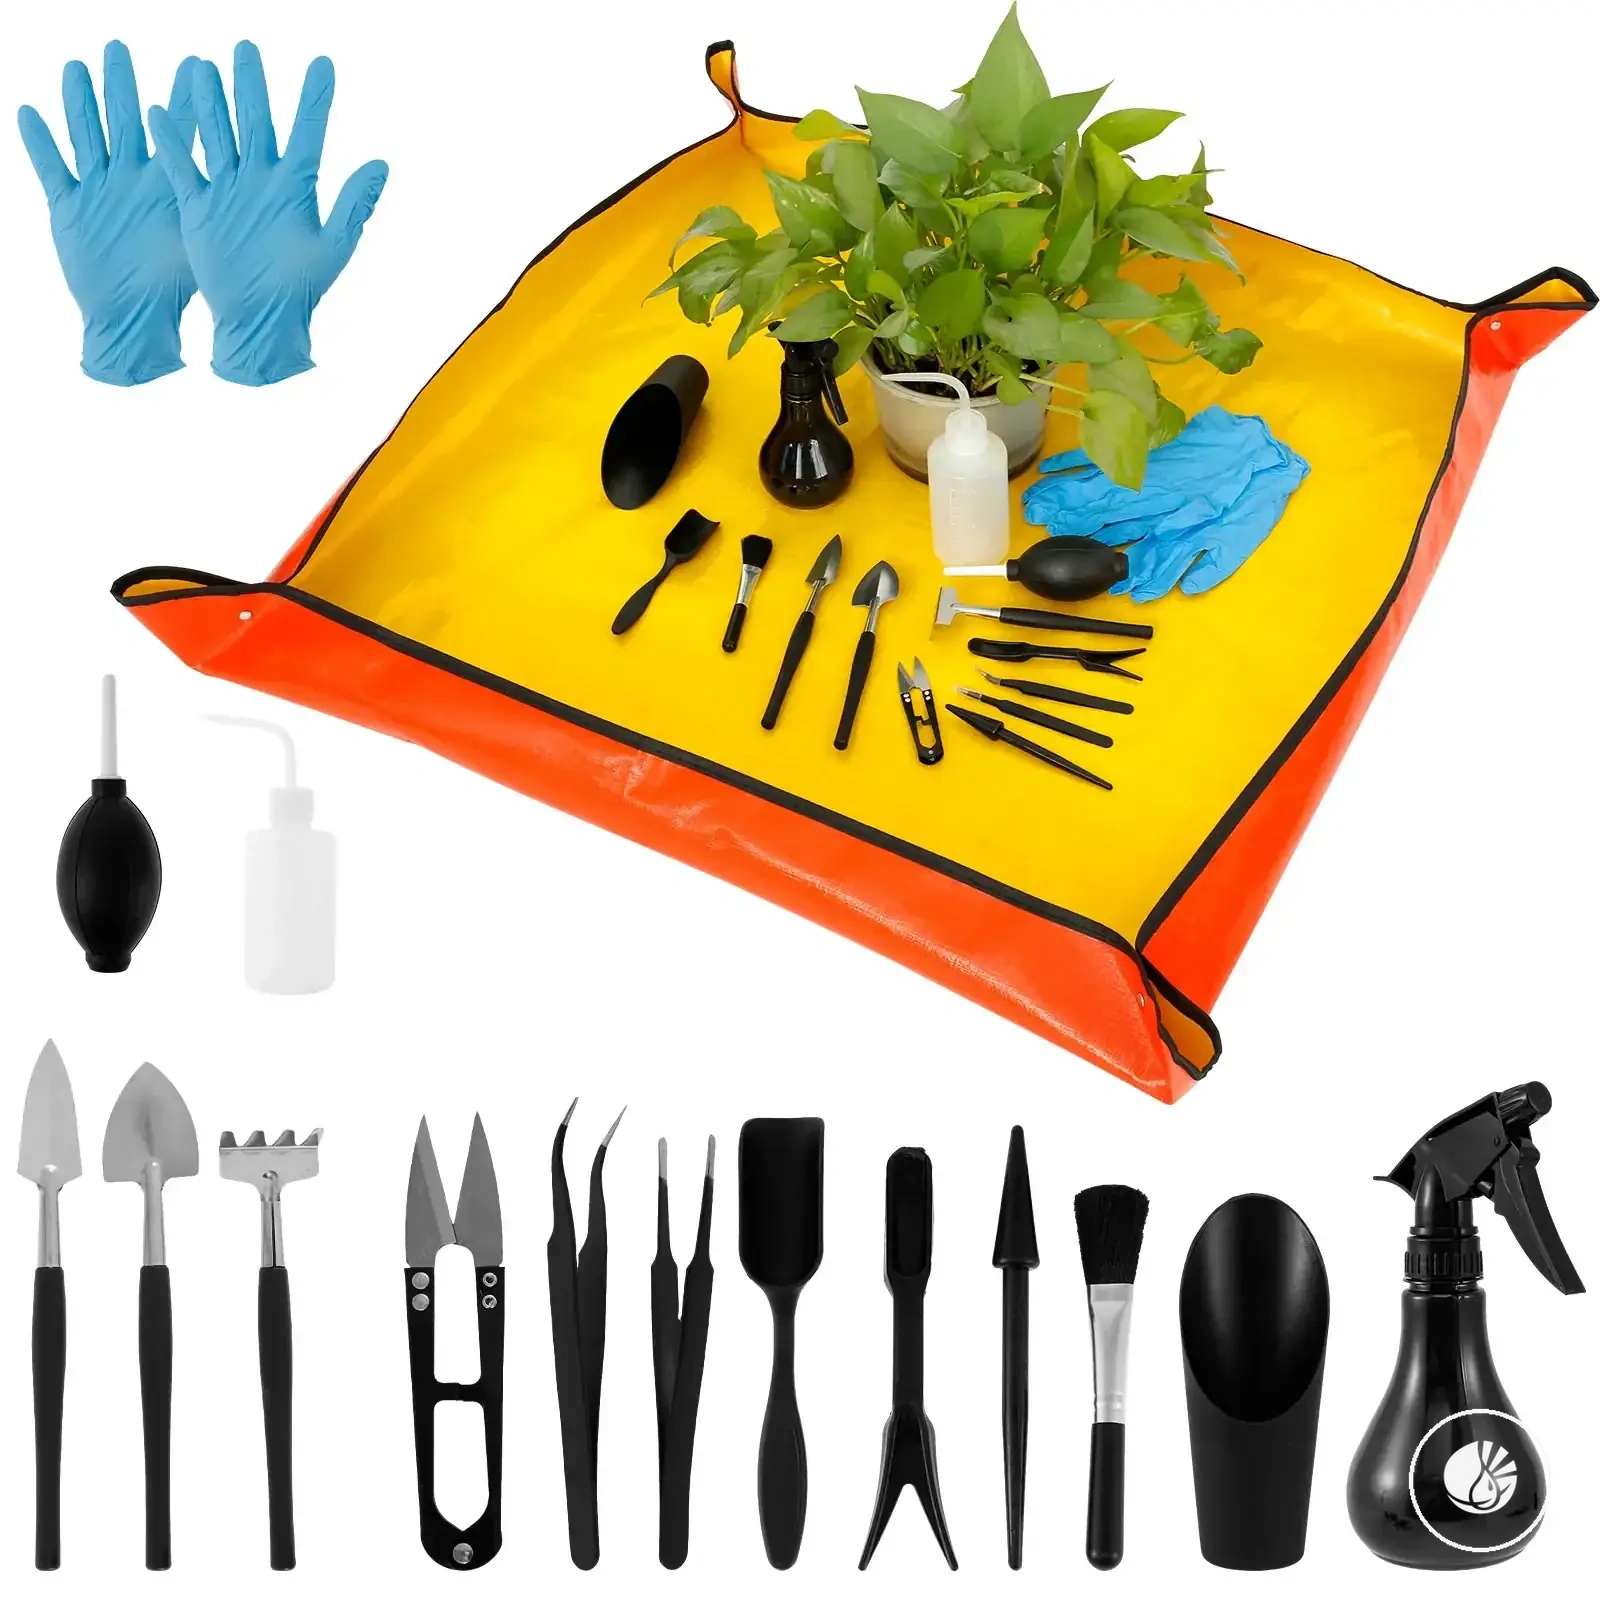
Essential tools in a beginner indoor plant care kit
Essential tools in a beginner indoor plant care kit are the basic care tools that support recurring observations and simple maintenance decisions. Their value comes from helping a beginner interpret plant conditions and perform routine tasks rather than collecting accessories that may have limited use. Essential tools should align with recurring care checks and provide practical decision support.
Essential tools in a beginner indoor plant care kit can be grouped by the care check or task they support. The image below labels the main tool groups and what each tool helps a beginner observe or manage.

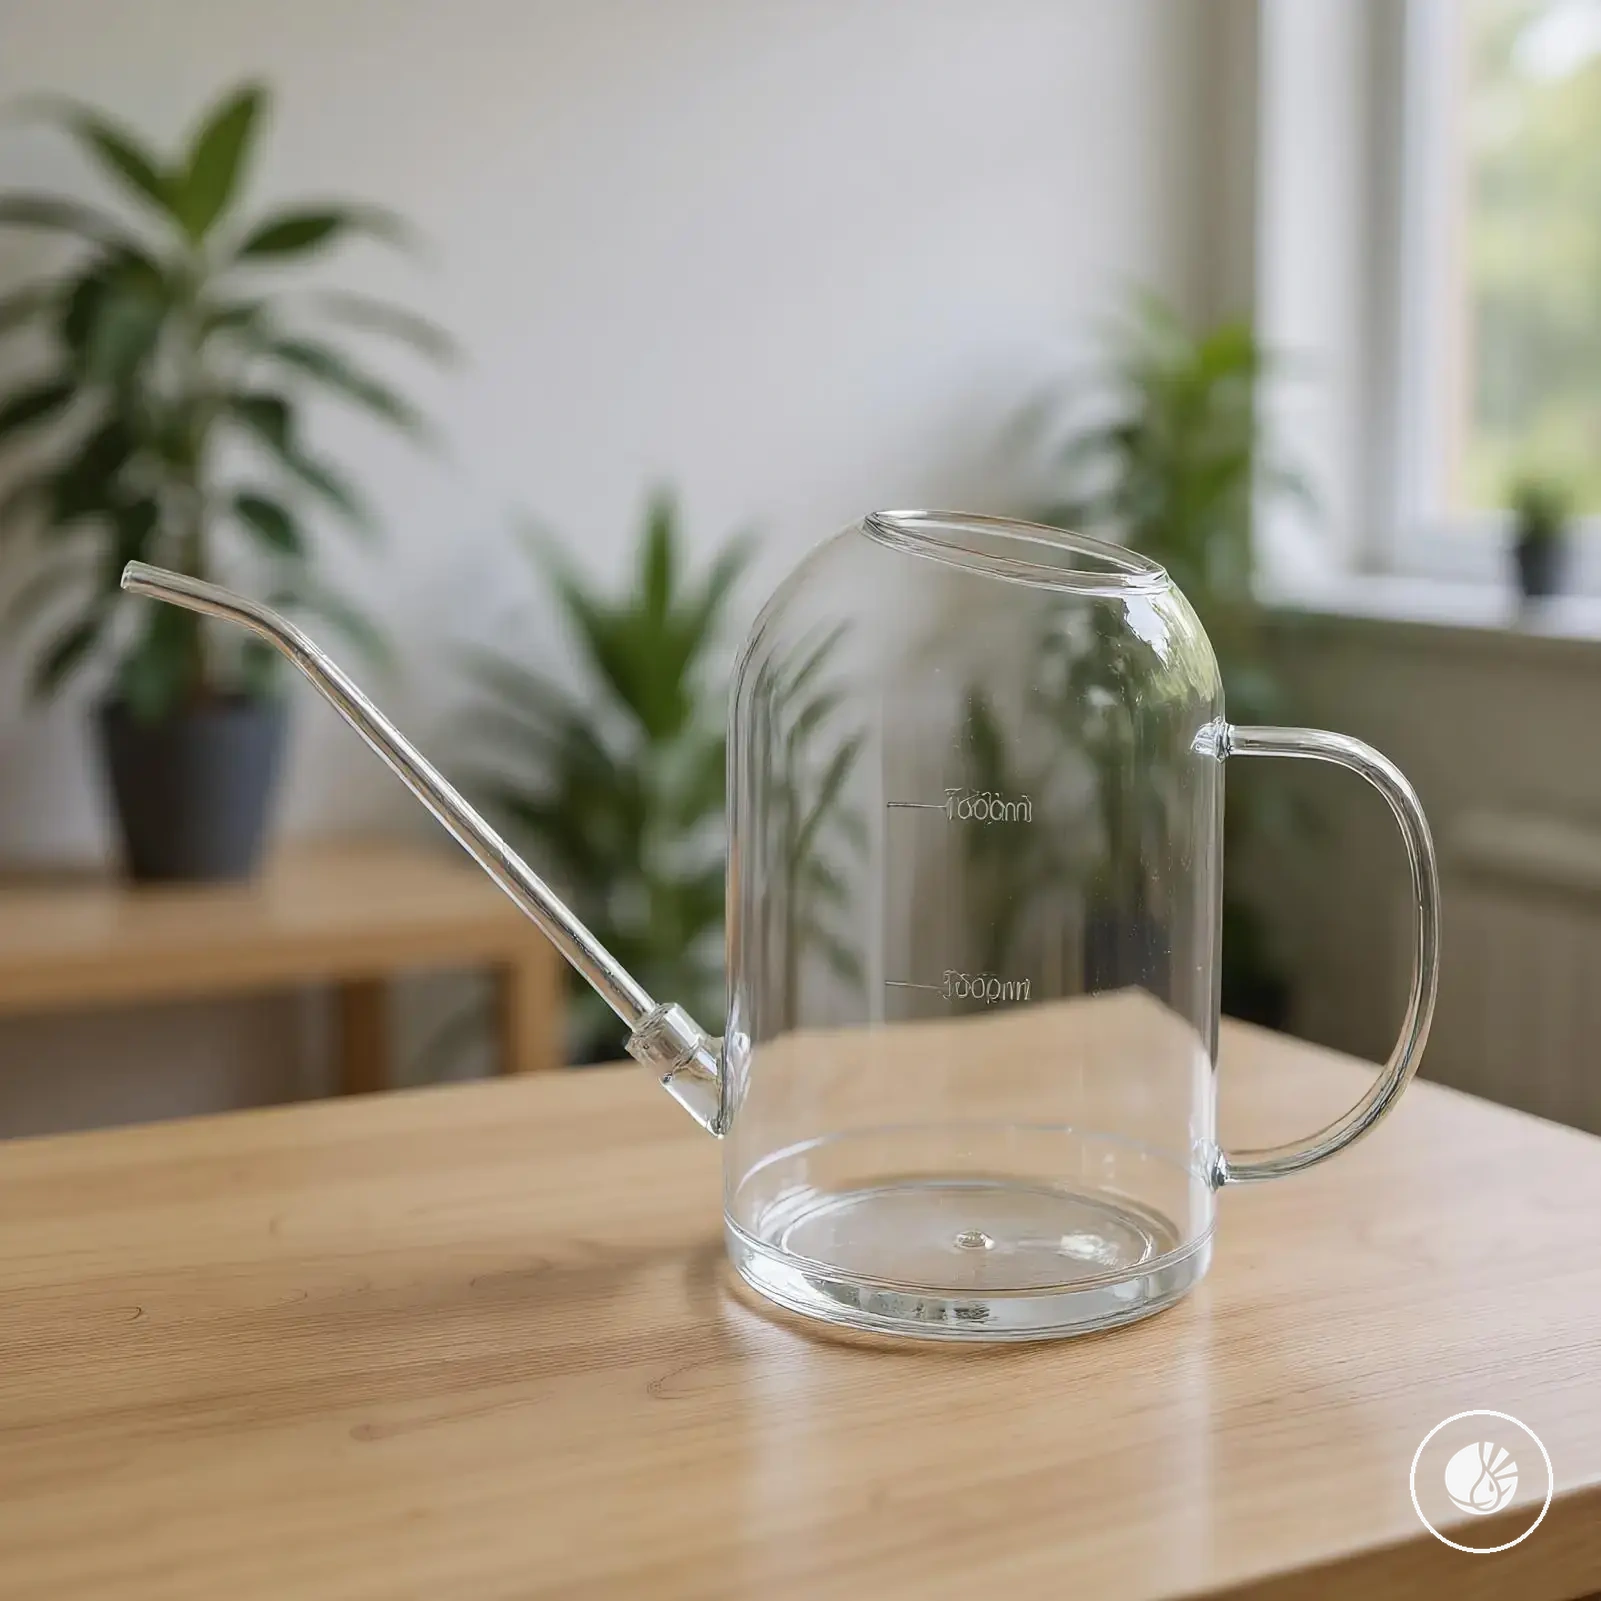
- Watering can: Supports watering care checks and controlled water application. It matters when a watering decision follows observations of plant and soil conditions.
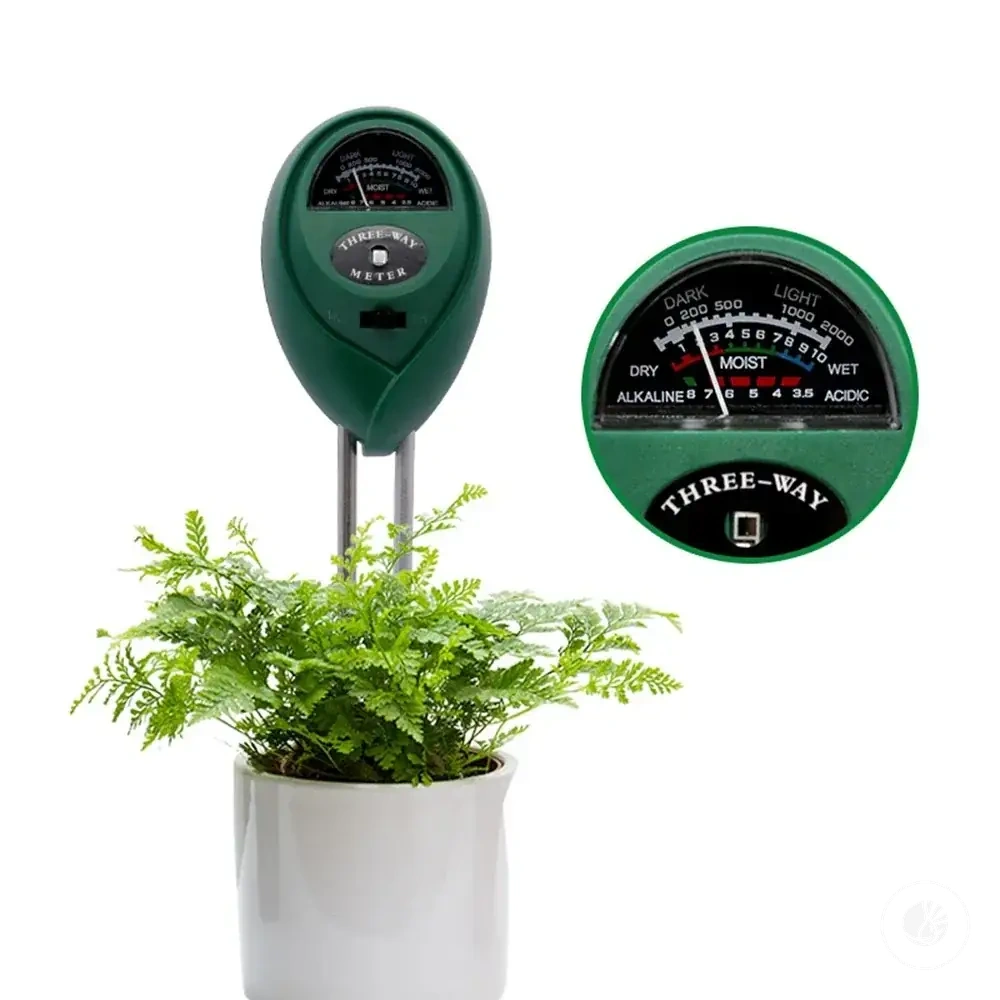
- Moisture meter: Supports soil moisture checks. It may help when soil moisture is difficult to assess and a watering decision depends on clearer observations.
- Humidity meter: Supports room-condition checks. It can help identify humidity limitations when foliage appearance or plant response seems connected to indoor conditions.
- Potting mat: Supports potting, handling, and cleanup tasks. It becomes useful when soil work creates a need for a more organized work area.
- Pruning scissors: Supports basic maintenance and foliage handling. They may be useful when routine trimming requires more precise plant handling.
Core tools usually support recurring care checks, while optional accessories often become relevant only after a repeated need appears. For a broader view of tool-group relationships, see starter care tools and kits after identifying which tools provide the most immediate decision support.
Watering can, moisture meter and drainage support
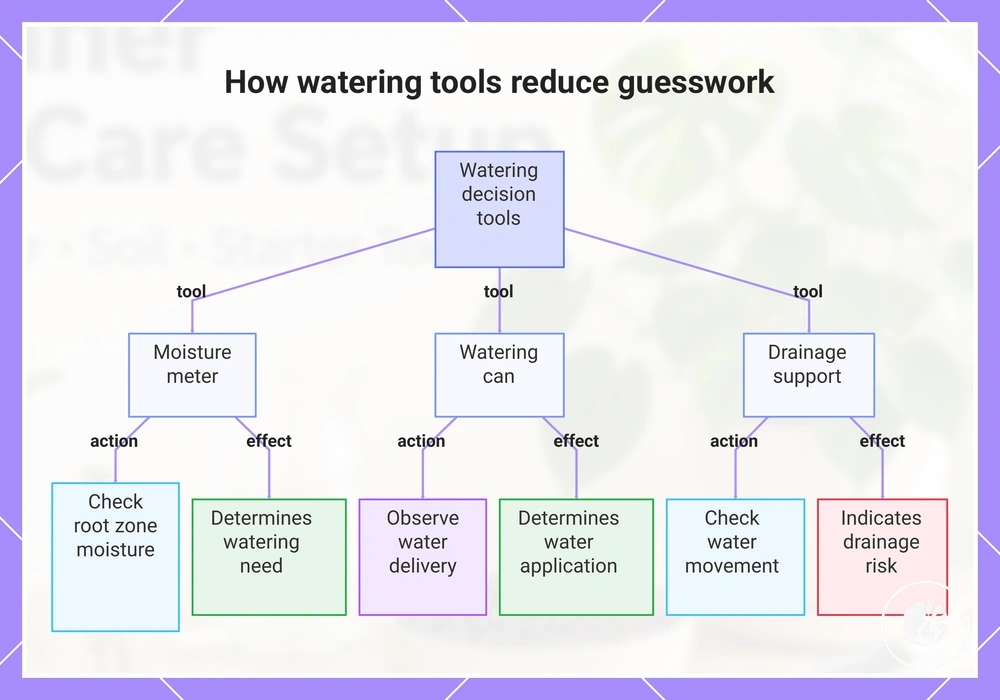
Watering decisions become difficult when soil moisture is estimated instead of checked. A watering can, moisture meter, and drainage support help a beginner evaluate water delivery, soil condition, and root zone conditions before adding more water. Together, these tools reduce guessing.
A practical contrast is comparing a moisture check with watering on a fixed calendar. If a calendar suggests watering but soil moisture and drainage cues indicate that the root zone may still contain moisture, the watering decision may change. The checklist below shows how each support contributes to a safer moisture decision, and readers can review a broader beginner watering setup when watering decisions depend on recurring conditions.
- Moisture meter: Check soil moisture near the root zone; the signal affects whether watering may be needed.
- Watering can: Observe water delivery into the pot; the signal affects how moisture is applied.
- Drainage support: Check how water moves through the pot; the signal affects drainage-related watering risk.
- Root zone condition: Combine moisture meter readings with soil condition observations; the signal affects the watering decision.
- Fixed calendar comparison: Compare schedule-based watering with a moisture check; the signal affects whether adjustment may be appropriate.
This chart shows how a moisture meter, watering can, and drainage support each provide signals for safer watering decisions.
Humidity meter, mister and basic foliage-care tools
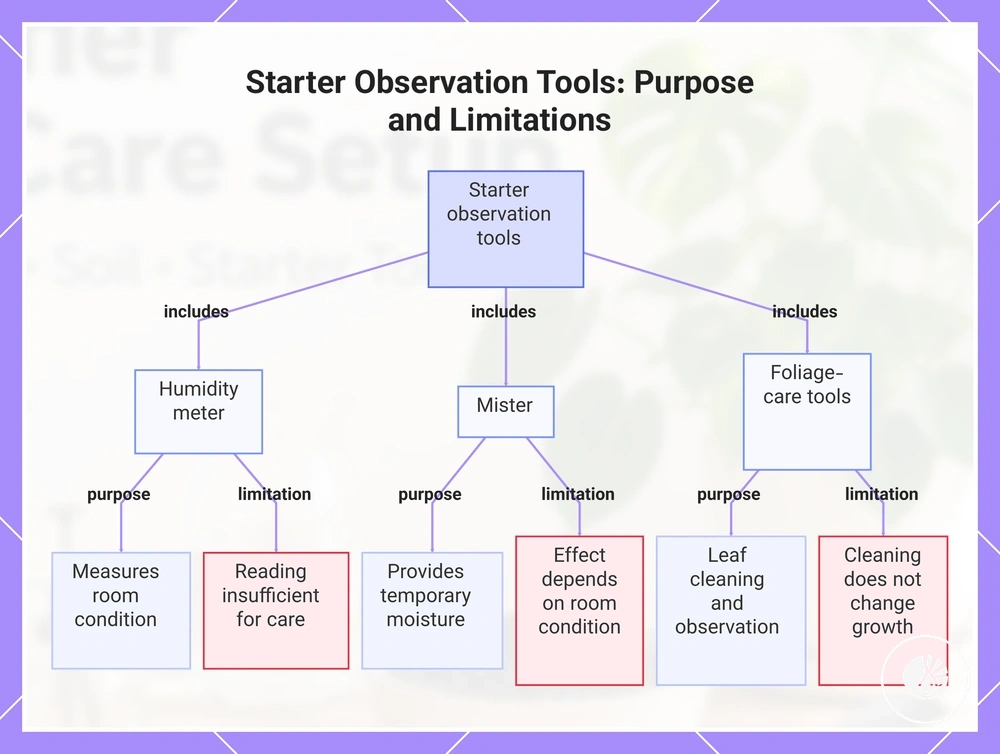
A humidity meter, mister, and foliage-care tools are observation-focused supports that help a beginner understand room condition and plant appearance. A humidity meter provides a room-condition reading, a mister supports temporary moisture on foliage surfaces, and foliage-care tools help keep leaves clear for easier observation. Their primary purpose is to improve observation and support a more informed care response.
The bullets below show what each tool clarifies and where its limitation begins. Starter tools can support observation, but room condition and plant response may still depend on factors beyond these basic tools.
- Humidity meter: Measures a room-condition reading; useful when comparing environmental conditions; limitation: the reading alone does not determine the correct care response.
- Mister: Supports temporary moisture on foliage surfaces; useful when light foliage moisture is desired; limitation: the effect may be temporary and depends on room condition.
- Foliage-care tools: Support leaf cleaning and observation; useful when dust affects visibility of plant surfaces; limitation: leaf cleaning does not by itself change growing conditions.
- Later upgrade consideration: A humidity meter may help identify when a later upgrade could be considered; limitation: advanced humidity equipment is not a beginner requirement.
This chart shows the three starter observation tools – humidity meter, mister, and foliage-care tools – and explains their purpose and key limitations.
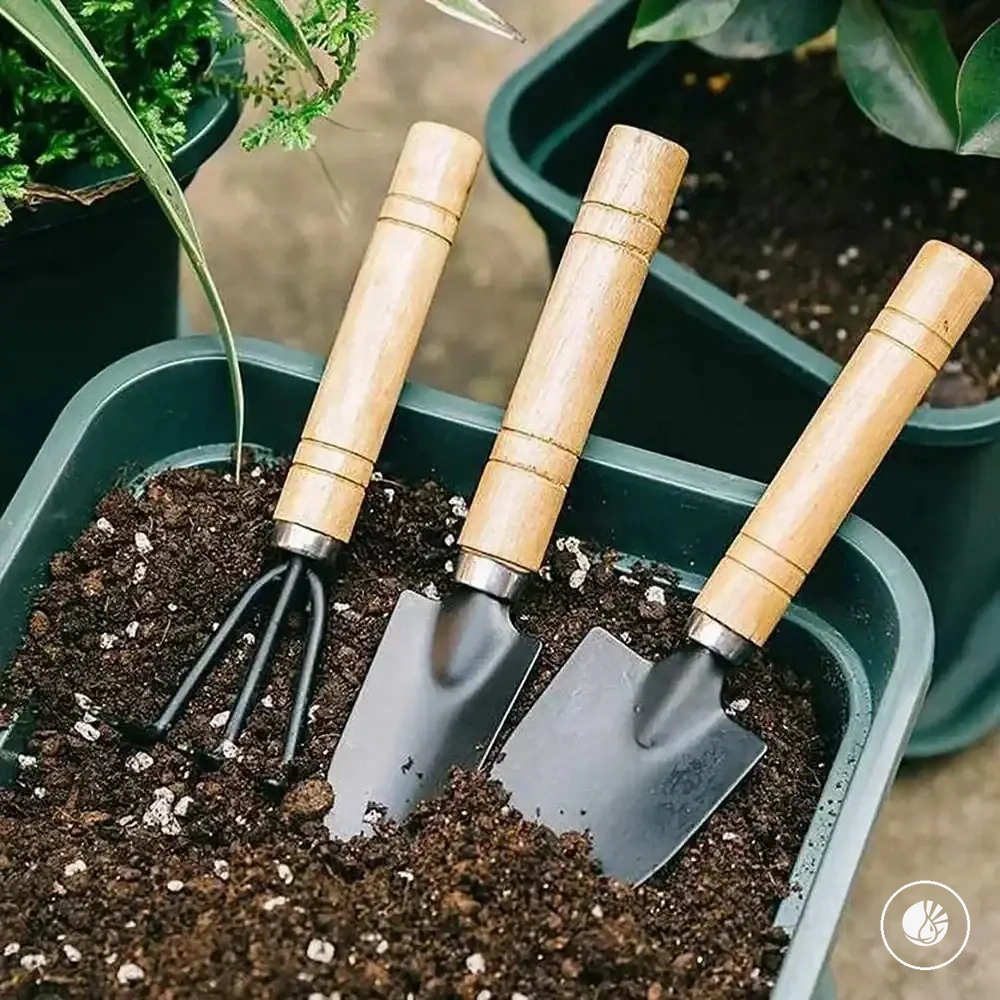
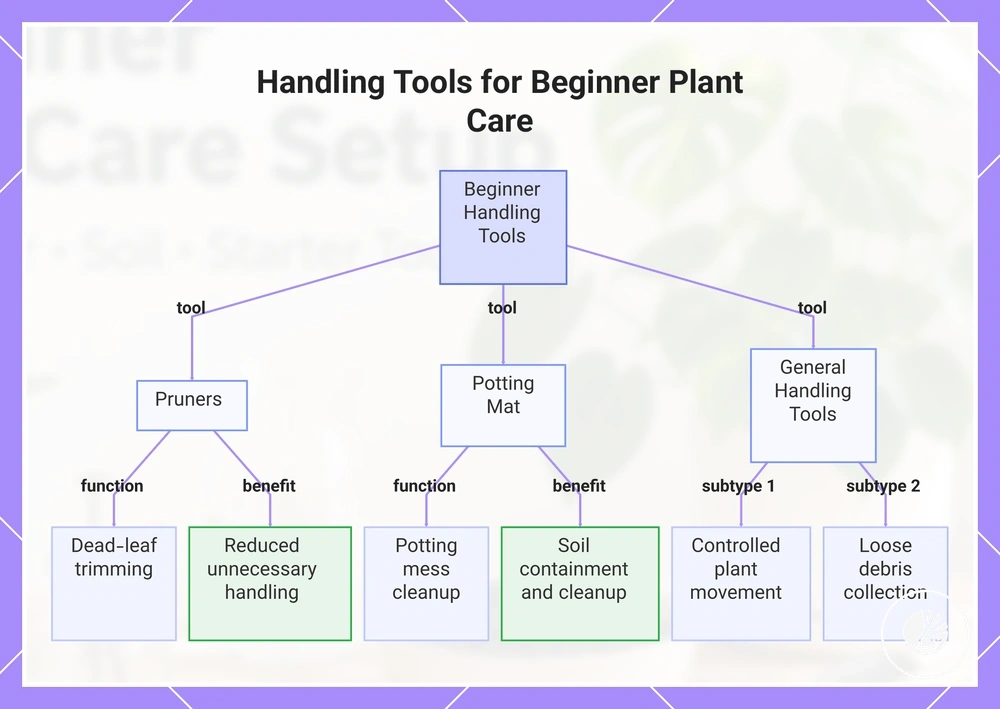
Pruners, potting mat and small handling tools
When a beginner removes dead leaves, cleans loose soil, or manages a small potting mess, pruners, a potting mat, and other handling tools may become useful. These handling tools support clean, low-risk maintenance tasks rather than primary care controls such as light, water, humidity, or soil observation. Their role is limited to handling support and risk reduction.
The handling tools below become useful in specific beginner conditions. Each tool supports a narrow task and handling benefit, while basic maintenance remains the limit of these tasks.
- Pruners: Support dead-leaf trimming; useful when dead leaves need a clean cut during basic maintenance; benefit: may reduce unnecessary handling of nearby foliage.
- Potting mat: Supports cleanup of a potting mess; useful when light soil handling creates loose debris; benefit: may help contain soil and simplify cleanup.
- Handling tools: Support careful plant handling; useful when a beginner condition calls for more controlled movement of the plant; benefit: may provide risk reduction and improve care confidence.
- Cleanup tools: Support collection of loose soil and plant debris; useful after light cleanup tasks; benefit: may support a cleaner work area with less mess.
This chart outlines the main handling tools for beginners, their specific functions, and the benefits they provide during low-risk plant maintenance.
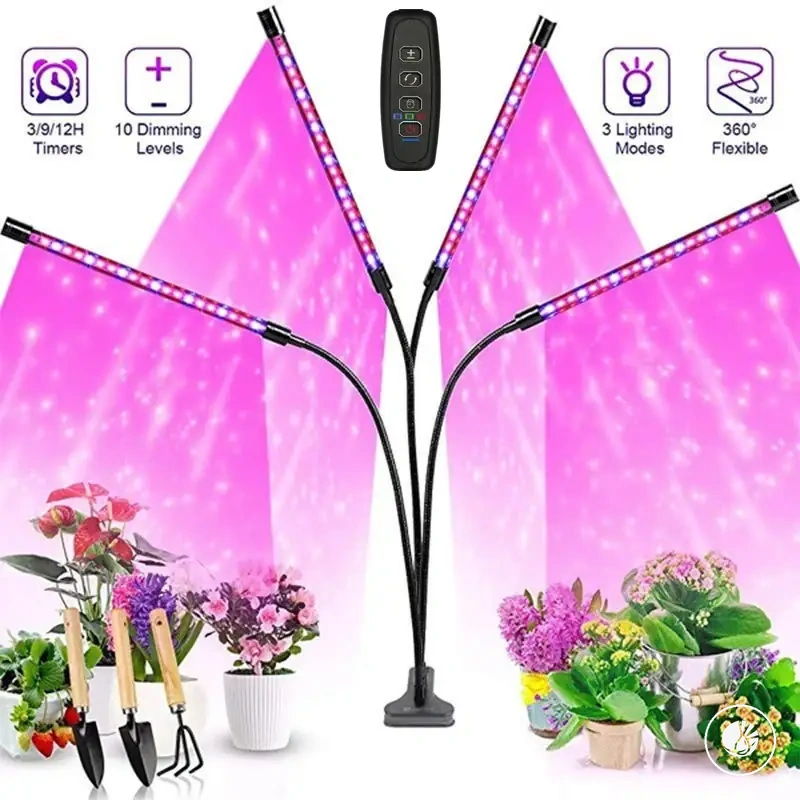
Beginner grow-light support inside a starter setup
Beginner grow-light support inside a starter setup depends on room light, plant response, placement, and duration rather than a fixed recommendation. Grow-light support may become useful when available light appears limited or inconsistent, while natural light may support the plant adequately in other situations. The decision should follow observed conditions, and natural light may be enough.
Room-light conditions and plant response provide the main compatibility criteria for grow-light support. For broader placement and light-evaluation criteria, a beginner light setup can help determine whether supplemental light belongs in a starter setup.
Beginner grow-light support inside a starter setup is easier to evaluate when placement, room light, and visible plant response are viewed together. The visual below highlights how fit, placement, and room-light conditions can influence compatibility.

- Condition: A low-light room limits available daylight. Visible signal: Plant response may appear slower or less consistent. Setup implication: Supplemental light may be considered as support.
- Condition: Placement is far from a window. Visible signal: Light reaching the plant may seem reduced compared with brighter locations. Setup implication: A small grow light may help support the existing setup.
- Condition: Daylight availability changes frequently. Visible signal: Plant response may vary with changing room light. Setup implication: Grow-light support may help provide more consistent light exposure.
- Condition: Natural light remains adequate near the plant. Visible signal: Plant response appears stable under current placement. Setup implication: Additional grow-light support may not be necessary.
A low-light room, a distant window, or inconsistent daylight may increase the relevance of beginner grow-light support, but outcomes depend on room light, placement, duration, and plant response. These examples are compatibility cues rather than fixed rules.
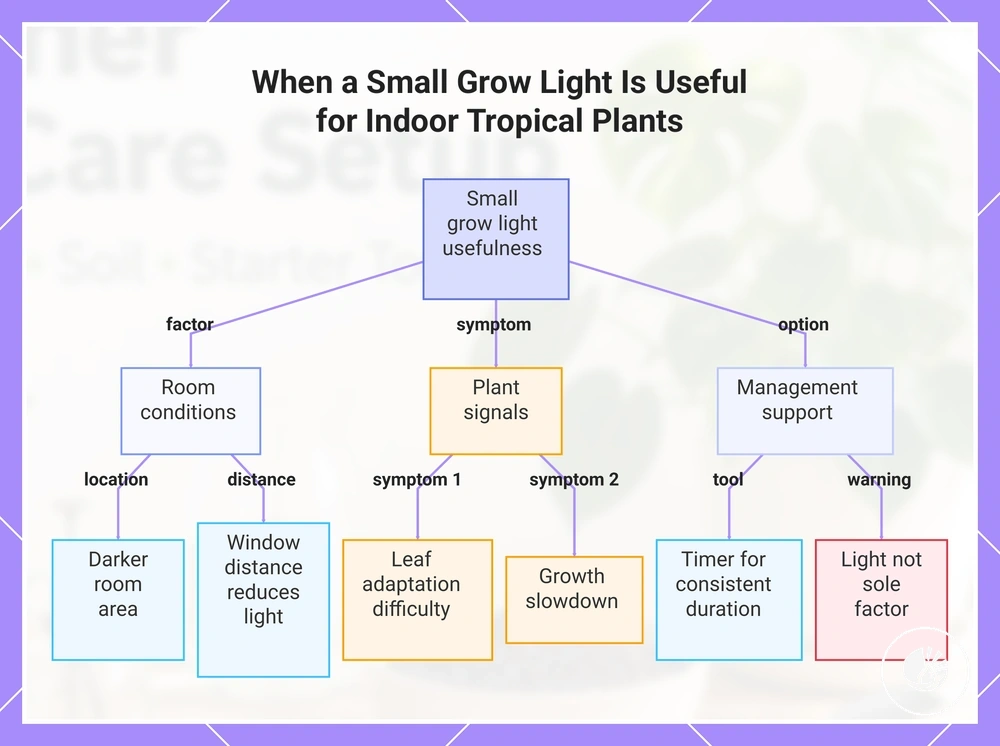
When a small grow light is useful for indoor tropical plants
A small grow light is useful for indoor tropical plants when observed light limits and plant response suggest that available natural light may not be consistently reaching the plant. Its usefulness depends on room location, window distance, duration, and visible plant signals rather than a fixed rule. A small grow light becomes more relevant when conditions indicate observed light limits.
The criteria below help determine whether a small grow light may provide helpful light support in a beginner setup. Room conditions matter, but plant response remains the deciding signal.
- Room location: If the plant is placed in a darker area of a room, a small grow light may provide supplemental light support.
- Window distance: If window distance reduces available natural light, a compact light may become more useful.
- Leaf response: If leaf response suggests difficulty adapting to current light conditions, additional light support may be worth considering.
- Growth slowdown: If growth slowdown appears alongside limited room light, a small grow light may help address one possible contributing factor.
- Timer availability: If a timer supports more consistent duration, a beginner setup may be easier to manage over time.
In a low-light room, supplemental light may support indoor tropical plants when natural light is limited, but light remains only one factor among placement, watering, humidity, and other care conditions.
This chart shows the key criteria to determine whether a small grow light can support your indoor tropical plants.
Placement and timing signals for beginner grow-light use
Grow-light placement and timing can become confusing when a beginner tries to copy rigid setup rules. A safer approach is to treat light position, distance sensitivity, and timer consistency as local setup decisions shaped by room context and plant response. This keeps the change gradual and supports gradual adjustment.
The steps below show how placement and timing signals can guide beginner grow-light use without relying on rigid distance, wattage, or hour rules. Watch leaf response after each change so useful light support does not become overcorrection.
- Set a cautious light position: Place the light where it supports the plant without crowding the foliage; watch for leaf stress and adjust gradually if the response seems poor.
- Respect distance sensitivity: Treat distance as a condition to test, not a fixed rule; if leaves appear stressed, increase caution before changing other care factors.
- Use timer consistency: Use a timer to make timing more predictable; if plant response changes, adjust timing slowly rather than making large changes at once.
- Compare support with overexposure: Useful light can support a darker room context, but excessive exposure may increase risk if leaf stress appears; reduce intensity or duration when the plant signals discomfort.
How to choose a beginner plant care starter kit
A beginner plant care starter kit should be evaluated based on plant count, room conditions, and care confidence rather than marketing hype. The primary selection criterion is whether each kit component addresses a recurring care need that the beginner can reliably manage. Choosing a kit through clear criteria ensures more practical decision-making than relying on promotional claims.
The following table outlines key kit components, their selection criteria, suitable conditions, and potential decision effects within a beginner setup.
| Kit component | Selection criterion | Suitable condition | Decision effect |
|---|---|---|---|
| Moisture checking tool | Need for clear soil-moisture observation | Watering decisions are uncertain | Can help improve confidence in moisture management |
| Watering control tool | Need for controlled water delivery | Inconsistent watering routines | Can support more predictable watering habits |
| Humidity awareness tool | Need to monitor room conditions | Indoor conditions fluctuate noticeably | May help interpret environmental influences on plant response |
| Basic handling tools | Need for safe maintenance support | Routine trimming or minor plant handling is required | Can help reduce handling risks and improve care confidence |
| Potting support items | Need for occasional soil-related tasks | Repotting or soil handling is expected | Can simplify cleanup and handling during maintenance |
For beginners with only a few plants, a simple kit may be preferable to a larger bundle, as it reduces complexity and focuses on essential components. As plant count, room conditions, or care confidence increase, additional tools may be integrated. For deeper guidance on selecting tool groups, see starter care tools and kits for contextual decision support .
Matching kit contents to plant count and room conditions
Plant count and room conditions help determine which kit contents are likely to be useful in a beginner setup. When more plants are involved or room conditions vary more often, measurement and consistency tools may become more relevant for day-to-day care decisions. The goal is matching kit contents to actual setup conditions rather than adding tools without a clear purpose.
The checklist below connects common conditions to useful kit contents. Kit fit depends on plant count, window exposure, humidity variability, pot types, and watering confidence within the current setup.
- Plant count: If plant count increases, measurement tools may become more useful because care decisions need greater consistency across plants.
- Window exposure: If window exposure differs between plant locations, light-related observation tools may help support placement decisions.
- Humidity variability: If room conditions change noticeably, humidity-awareness tools may help interpret environmental differences.
- Pot types: If pot types affect moisture retention differently, moisture-checking tools may help compare watering conditions.
- Watering confidence: If watering confidence is still developing, watering-control tools may support more consistent routines.
- Example fit: A single-plant beginner may find starter contents focused on watering confidence and moisture checking sufficient, while a small multi-plant setup may benefit from additional measurement tools when room conditions vary.
Starter kit value versus buying individual tools
Starter kit value versus individual tools depends on whether the kit covers the needed tools without adding unnecessary duplicates or unused accessories. A starter kit may provide value when bundle completeness aligns with current care needs, while individual tools may be preferable when only a single care gap exists. The overall value decision depends on need coverage and redundancy.
The comparison below illustrates when each option may be more suitable, considering bundle completeness, tool redundancy, upgrade path, and beginner decision confidence. Choosing a route depends on which option aligns better with the current setup and anticipated needs.
| Starter kit is better when | Individual tools are better when |
|---|---|
| Needed tools are included in the bundle and few items remain unused | Only one specific care gap exists and separate tools can address it |
| Tool redundancy is minimal and most items are likely to be used | Duplicate items would reduce usefulness or create confusion |
| Upgrade path can begin with the full kit and expand if needed | Incremental addition of tools matches evolving care requirements |
| Beginner decision confidence benefits from grouped essential tools | Beginner decision confidence benefits from selecting each tool for a clear purpose |
Tools to skip until the care need is proven
Tools to skip in a beginner setup depend on whether a clear care need has been observed. Adding optional tools before recurring conditions, observation gaps, or repeated issues can create unnecessary complexity and reduce care decision clarity. A more effective approach is to delay optional tools until the care need is proven.
The categories below highlight optional tools that may be postponed until specific conditions justify a later purchase. Each category identifies the type of tool, the unproven need, and the condition that would support upgrading. This approach maintains flexibility while avoiding early acquisition of extras.
- Advanced humidity tools: Delay if room conditions do not create a repeated humidity concern. Upgrade may be justified when humidity variability begins to affect plant response consistently.
- Expanded light-support tools: Delay if current light is adequate for the plant's routine needs. Upgrade may be justified when light limitations become a recurring issue requiring supplemental exposure.
- Specialized measurement tools: Delay if basic observations suffice for routine care. Upgrade may be justified when a repeated condition calls for more precise measurements to guide decisions.
- Additional maintenance tools: Delay if routine handling remains minimal. Upgrade may be justified when plant care tasks expand and require more specialized support for efficiency and control.
- Expanded setup accessories: Delay if essential tasks are already covered by current kit contents. Upgrade may be justified when repeated use or changing setup conditions create a clear need for more accessories.
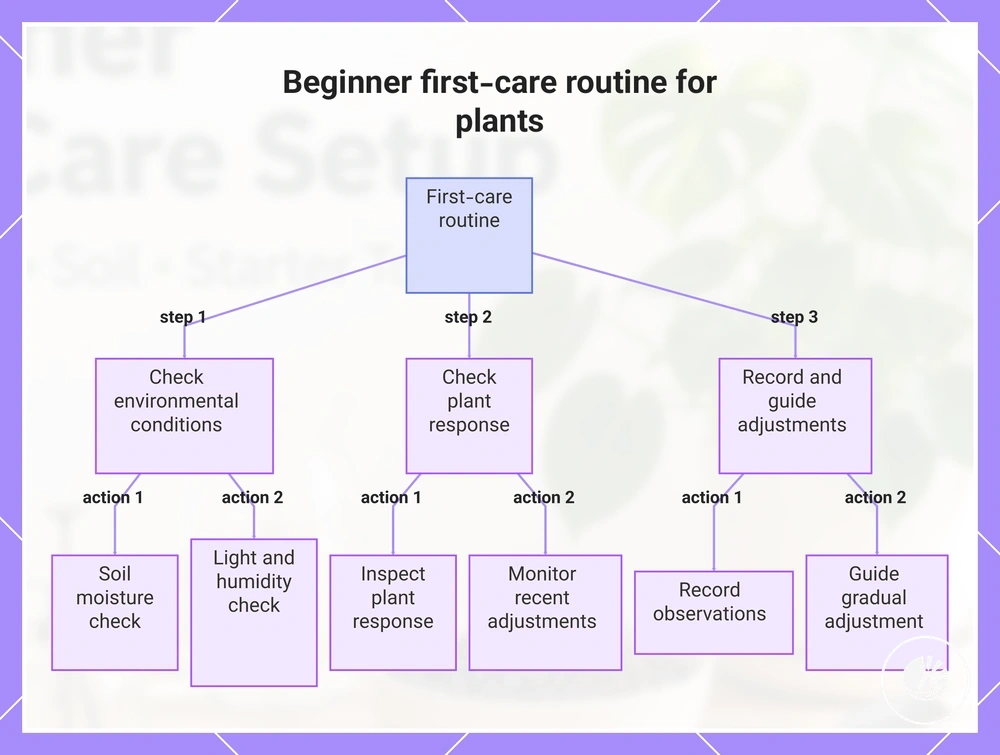
Simple first-care routine after setting up the tools
A first-care routine organizes starter tools around moisture, light, humidity, and plant response so early care decisions rely on observation instead of guesswork. Using the same sequence of checks can help beginners notice changes before making adjustments. The goal is routine consistency through observation and gradual adjustment.
The checklist below turns starter tools into a beginner routine built on first checks and follow-up care decisions. Each action reviews a condition, looks for an acceptable signal or warning signal, and supports gradual adjustment rather than immediate correction.
- Check soil moisture: Condition checked: moisture in the growing medium. Acceptable signal: moisture appears consistent with recent observations. Warning signal: moisture appears noticeably different from previous checks. Next care decision: review watering needs before adjusting care.
- Observe light conditions: Condition checked: available light around the plant. Acceptable signal: light exposure appears generally consistent. Warning signal: light seems reduced or uneven. Next care decision: consider whether placement should be reviewed.
- Review humidity conditions: Condition checked: humidity around the plant. Acceptable signal: humidity appears relatively stable. Warning signal: humidity seems to change noticeably between checks. Next care decision: continue observation before considering additional support.
- Inspect plant response: Condition checked: visible plant response. Acceptable signal: appearance remains generally consistent with recent observations. Warning signal: noticeable changes begin to appear. Next care decision: compare recent moisture, light, and humidity observations.
- Monitor recent adjustments: Condition checked: plant response after a previous care action. Acceptable signal: no new warning cues appear. Warning signal: changes continue or become more noticeable. Next care decision: adjust only one factor at a time when needed.
- Record observations: Condition checked: consistency of routine observations. Acceptable signal: conditions remain relatively stable over time. Warning signal: recurring concerns appear across multiple checks. Next care decision: use repeated observations to guide gradual adjustment.
Once the first-care routine is established, a beginner maintenance checklist can help organize broader recurring checks without turning this starter routine into a full maintenance schedule. The routine remains focused on observation, plant response, and gradual adjustment.
This chart outlines the three main steps of a first-care routine: checking environmental conditions, checking plant response, and recording observations to guide gradual adjustments.
Check soil moisture before changing watering frequency
Checking soil moisture before changing watering frequency ensures that adjustments are based on actual conditions rather than assumptions. Observing the soil zone, using a meter reading or finger check, evaluating pot drainage, recent watering, and plant response provides linked signals that guide safer watering adjustments. This routine emphasizes checking before modifying frequency.
Follow these steps to implement a soil moisture–first approach. Each step describes what to check, the signals to notice, and how to adjust conditionally, while recognizing that one observation alone does not replace ongoing monitoring.
- Assess the soil zone: Check moisture at the root zone. Signal: soil feels moist or dry. Adjustment: delay watering if the root zone remains moist.
- Use meter reading or finger check: Measure soil moisture with a tool or touch. Signal: readings indicate moisture presence or lack. Adjustment: consider whether to adjust frequency based on repeated checks.
- Observe pot drainage, recent watering, and plant response: Watch how water moves through the pot, note recent watering, and observe leaf turgor or wilting. Signal: slow drainage or signs of stress. Adjustment: adjust watering frequency gradually, using multiple observations rather than a single reading.
This local routine keeps soil moisture central to watering decisions, linking root-zone checks and plant response to gradual watering adjustments rather than fixed schedules or absolute conclusions. Consistent observation beyond one reading ensures more informed first-care actions .
Track light, humidity and leaf response together
Tracking light, humidity, and leaf response together helps beginners connect environmental readings with visible plant signals before making adjustments. A humidity reading or light exposure note becomes more useful when paired with leaf texture, leaf tips, growth pace, and adjustment timing. The goal is paired observation.
The optional mini-log below organizes environmental readings and leaf response in one place. For example, a single humidity reading should not override multiple plant signals if leaf texture, leaf tips, and growth pace appear stable, because care decisions should consider more than one room condition or visible signal.
| Date | Light/humidity note | Leaf response | Adjustment |
|---|---|---|---|
| Observation date | Light exposure and humidity reading | Leaf texture, leaf tips, and growth pace | Adjustment timing based on repeated signals |
| Follow-up date | Changed room condition or similar reading | Visible plant response compared with previous notes | Continue observation or adjust gradually if signals repeat |
Beginner setup mistakes that lead to poor care decisions
Beginner setup mistakes can distort care decisions when room conditions or tool readings are misread, often resulting in overcorrection. Misleading signals may prompt adding too many tools, adjusting watering too quickly, or overcompensating with light. Recognizing these patterns helps reduce the risk of poor care decisions.
The table below organizes common beginner setup mistakes, the misleading signals they produce, the likely poor decisions, and safer corrections that consider actual conditions without overreacting.
| Mistake | Misleading signal | Likely poor decision | Safer correction |
|---|---|---|---|
| Overbuying tools | Perception that more tools improve care | Adding unnecessary tools that complicate decision-making | Wait until repeated care needs justify new tools |
| Fixed watering schedule | Assuming schedule ensures proper moisture | Watering before confirming soil, drainage, or plant response | Check moisture and recent watering patterns before changing frequency |
| Reading-only decisions | Single tool reading appears conclusive | Altering care based on one measurement without context | Compare readings with plant response and room conditions before acting |
| Overcorrecting light exposure | Slow growth seems light-related | Adding excessive supplemental light without considering placement or duration | Adjust light gradually when both room light and plant response indicate a need |
Tool misuse can cause apparent problems when readings are treated as sole indicators, whereas a genuine plant-environment mismatch requires broader observation of light, moisture, humidity, and placement. Safer corrections start by distinguishing tool error from environmental mismatch before changing the setup, reducing the risk of overcorrection and improving decision quality :contentReference[oaicite:0]{index=0}.
Overbuying tools before understanding the plant environment
Overbuying tools before understanding the plant environment can make beginner care less clear because extra tools may introduce more decisions than the current setup requires. When plant response and room conditions have not been observed long enough, unnecessary tools, duplicated functions, and advanced controls can increase complexity and create care confusion. The main cost-value risk is reduced clarity.
The points below highlight common decision risks linked to overbuying. Each risk includes a way to verify whether a tool is needed before adding it, and a repeated condition should act as the upgrade trigger rather than curiosity alone.
- Unused tools: A tool may remain unused when no recurring care need exists; verify need by tracking whether the same observation challenge appears repeatedly.
- Duplicated functions: Multiple tools with similar roles can create conflicting interpretations; verify whether an existing tool already supports the decision.
- Advanced controls: Advanced controls may add complexity before basic observations are understood; verify need when a repeated condition cannot be monitored clearly with current tools.
- Limited plant count: A limited plant count may not require expanded tool coverage; verify need by observing whether current care tasks consistently exceed available support.
- Example: If humidity-related observations create the same repeated condition across multiple checks, an additional monitoring tool may become justified because the upgrade is tied to an observed need rather than an assumed one.
Using tool readings without checking plant symptoms
A common myth is that tool readings provide a complete answer on their own. The more reliable approach is to interpret tool readings alongside plant symptoms and room context because a reading type may not reflect the full condition affecting the plant. Tool readings are signals, not complete answers.
The diagnostic checklist below connects reading type, visible symptoms, recent care action, room condition, and the next check. Using multiple signals together can improve interpretation quality and support a more informed follow-up check rather than relying on a single measurement. :contentReference[oaicite:0]{index=0}
- Reading type: Review the current measurement. Plant symptom: Compare it with visible symptoms. Room context: Consider surrounding conditions. Next check: Confirm whether the reading and visible response support the same interpretation.
- Reading type: Observe the current tool reading. Recent care action: Check whether watering, relocation, or another adjustment happened recently. Next check: Determine whether the reading may reflect that recent care action.
- Reading type: Compare the measurement with the current room condition. Plant symptom: Note whether visible symptoms appear consistent with the environment. Next check: Continue observation if the signals do not align clearly.
- Reading type: Compare current and previous measurements. Plant symptom: Observe whether visible symptoms are changing. Room context: Check whether conditions have also changed. Next check: Use a follow-up check before adjusting care.
- Boundary cue: Persistent yellowing, drooping, pests, or brown tips may require more focused troubleshooting because tool readings alone may not provide enough context for interpretation.
When a beginner setup should expand beyond starter tools
A beginner setup can expand beyond starter tools once repeated care signals show that current tools are insufficient to manage a recurring condition. Expansion should be guided by observed gaps rather than curiosity, focusing on missing tool capability and the corresponding upgrade category to gain decision benefits.
The conditional checklist below illustrates how repeated conditions may indicate a missing capability, suggest an upgrade category, and highlight the potential decision benefit.
| Repeated condition | Missing capability | Upgrade category | Decision benefit |
|---|---|---|---|
| Light is inconsistent across locations | Clearer light evaluation | Lighting support tools | May help compare placement decisions |
| Soil moisture is hard to gauge | Better moisture assessment | Moisture-checking support | May improve watering decision confidence |
| Humidity fluctuates noticeably | Room-condition monitoring | Humidity monitoring tools | May help link room conditions to plant response |
| Handling tasks become more frequent | Controlled handling support | Handling and maintenance tools | May support safer routine care actions |
| Routine checks are inconsistent | More repeatable observation process | Routine consistency tools | May help organize follow-up care decisions |
When choosing between options, consider that the same repeated condition may point to different upgrade categories depending on the care need. You can compare care solutions by need for guidance.
Starter tools remain the baseline before adding next-step tools. Starter care tools and kits provide a structured transition from baseline setup to added support when repeated conditions show missing capabilities.
Product references are illustrative and should appear only after criteria, risks, and decision logic are clear. They represent potential upgrade categories and do not imply required purchase or direct checkout. :contentReference[oaicite:0]{index=0}
The products below are useful examples for comparing available options. Before buying, check that the compatibility criteria, key features, and product details match your needs.