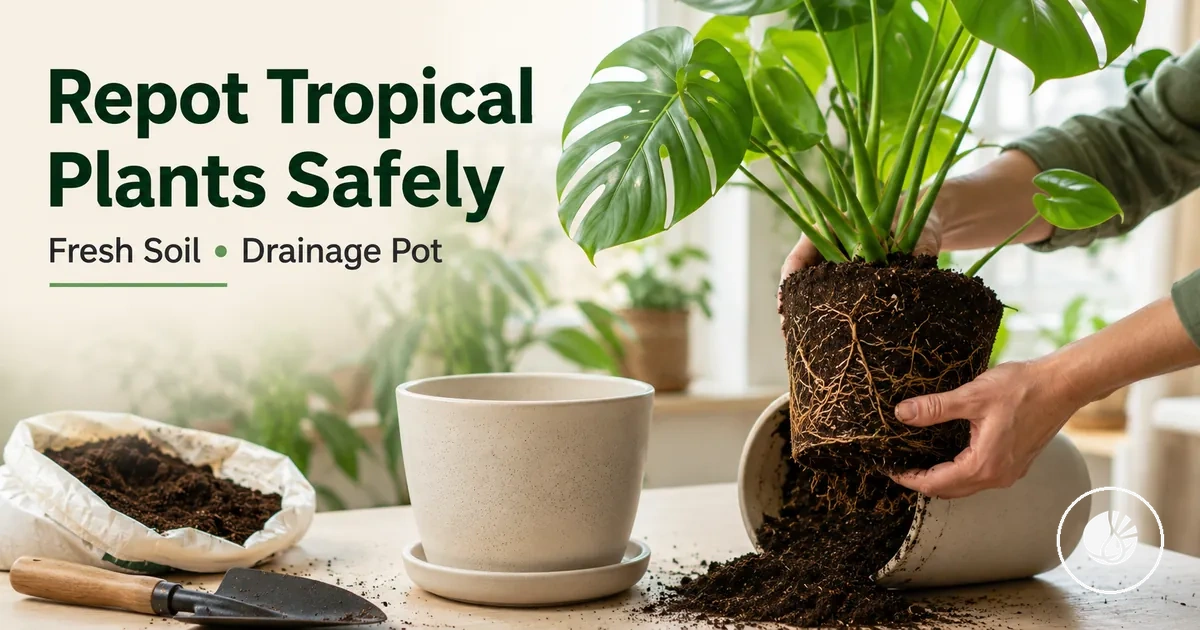
Safe repotting for indoor tropical plants
Safe repotting for indoor tropical plants starts when the root zone or potting mix can no longer support steady indoor growth. Repotting can help refresh root space, soil structure, and drainage, but it is not a fix for every yellow leaf or drooping symptom. The main safe repotting condition is a plant that shows root or soil stress and can handle careful root disturbance.
Repotting is the process of moving an indoor tropical plant into a better potting setup without damaging the roots more than necessary. Pot size, potting mix, drainage, and aftercare all affect how well the plant settles after the move. The right choice depends on plant condition, room light, humidity, watering behavior, and the risk of repotting shock. This makes repotting one part of broader indoor tropical plant care solutions.
When indoor tropical plants dry out too fast, sit in weak soil, or show signs that the root zone is crowded, repotting may be useful. If the plant is already stressed by low light, poor watering, or unstable humidity, the safer action may be to check readiness before changing the pot. The next step is to judge timing and plant condition before choosing tools, materials, or the ordered repotting process.
When indoor tropical plants are ready for repotting
When an indoor tropical plant shows root or soil changes, repotting readiness depends on multiple signals rather than one symptom. A single yellow leaf or temporary slowdown is not enough on its own. The main condition to check is whether root pressure, soil condition, drainage behavior, and growth response point to the same decision.
Use the checklist below to verify whether repotting is likely needed or whether waiting may be the better next action.
- Check the root zone: If roots appear to be limiting normal growth, repotting may support continued recovery and healthier development.
- Check the potting medium: If soil structure has declined and moisture balance becomes difficult to maintain, a fresh potting medium may improve root conditions.
- Check drainage: If watering regularly results in poor drainage despite appropriate handling, the current setup may no longer support efficient root function.
- Check growth response: If growth remains limited while light, humidity, and routine care stay suitable, repotting may be a reasonable next step.
A stressed indoor tropical plant does not automatically need a new pot. In many cases, watering adjustments, improved light, stable humidity, or a short recovery period may explain the symptom more clearly than root restriction. When multiple readiness signals align, repotting may be appropriate; when they do not, delaying the move can reduce unnecessary repotting shock.
This chart shows the four key readiness checks for repotting indoor tropical plants and how to use the combined signals to decide whether to repot or delay.

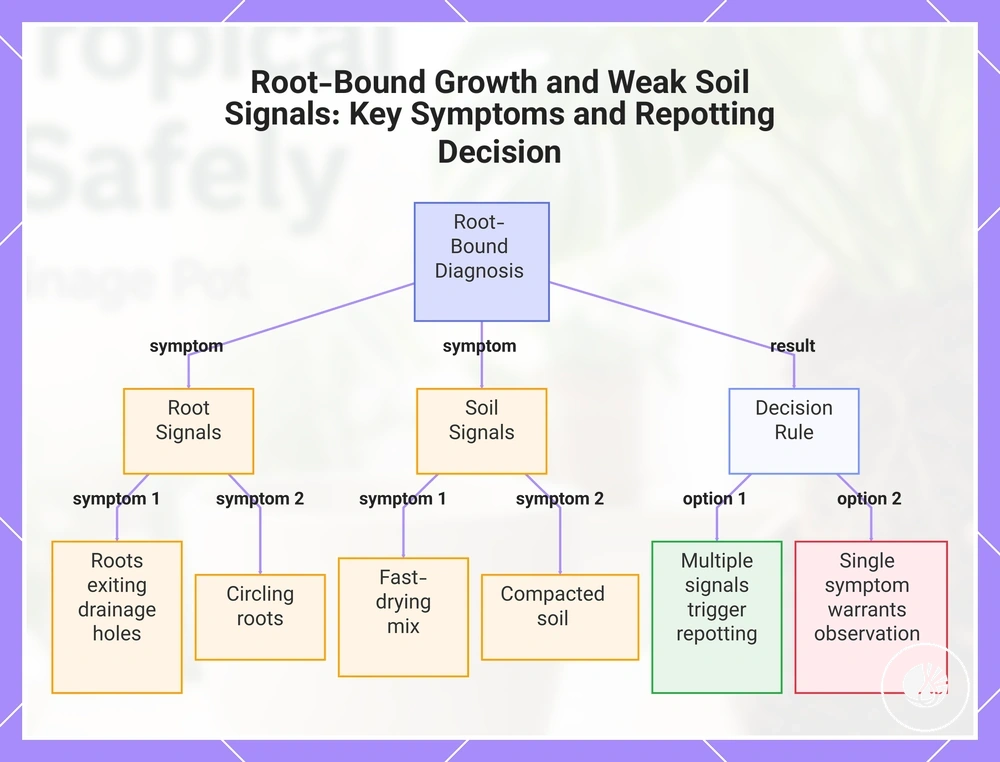
Root-bound growth and weak soil signals
When roots crowd the available space or the potting medium no longer supports stable moisture and airflow, repotting may become necessary. Visible symptoms are useful diagnostic clues, but the main condition to check is whether multiple root and soil signals point to the same underlying problem.
- Roots exiting drainage holes → Root zone pressure may be increasing → Check whether roots appear in multiple openings → This can suggest limited space, but does not confirm root-binding on its own.
- Circling roots → Roots may be following the container edge instead of spreading through soil → Check root arrangement during inspection → This can indicate restricted root development when combined with other symptoms.
- Fast-drying mix → The potting medium may no longer retain moisture evenly → Check whether watering frequency has increased without other environmental changes → This may point to root crowding or weakened soil structure.
- Compacted soil → Reduced airflow and moisture movement may affect root function → Check whether water struggles to penetrate the soil surface → This can suggest the potting medium is losing effectiveness.
- Stalled growth → Growth response may be limited by root or soil conditions → Check whether light, humidity, and routine care remain suitable → This symptom is more meaningful when combined with root or drainage issues.
- Water pooling on the surface → Drainage movement may be restricted → Check whether wet soil persists longer than expected → This can indicate weakened soil structure rather than a watering issue alone.
Drooping or yellowing can occur for reasons unrelated to root restriction, including temporary environmental stress. If these symptoms appear without root or soil evidence, a short recovery time may be more appropriate than immediate root disturbance. When multiple signals occur together, repotting may be worth considering; when only one symptom is present, further observation can reduce unnecessary repotting shock.
This chart shows the main symptoms of root-bound and weak soil conditions and the diagnostic rule for deciding when to repot.
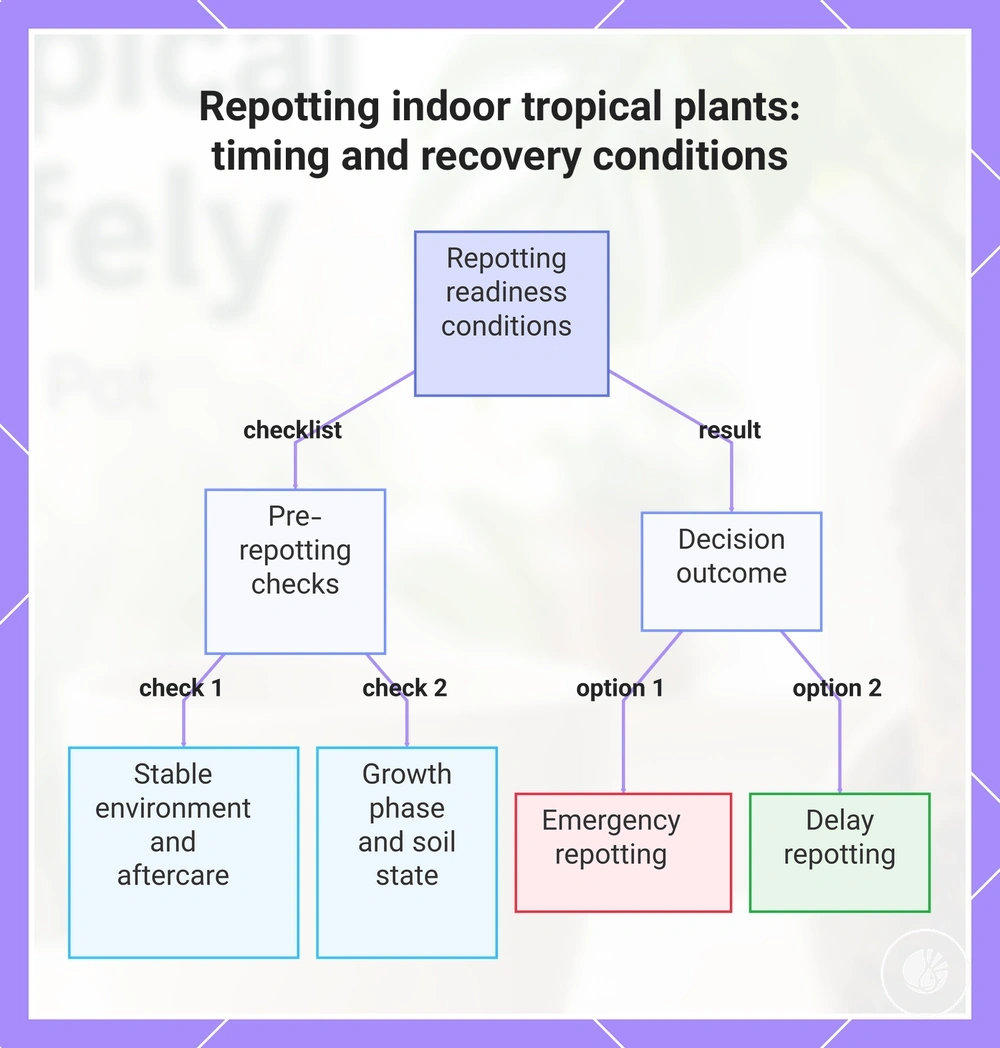
Seasonal timing and recovery conditions
When an indoor tropical plant is ready for repotting, safer timing depends on active growth, stable indoor conditions, and enough recovery capacity after handling. Season can guide the decision, but the main condition to check is whether the room environment can support recovery without increasing repotting shock.
Use the timing checklist below to decide whether to repot now, delay, or act because the current potting setup creates more risk than waiting.
- Season: Check whether the plant is in an active growth phase; repotting may be easier to recover from when growth is already moving.
- Temperature stability: Check whether the indoor space stays steady; unstable conditions can make root recovery less predictable.
- Light availability: Check whether the plant has suitable light after repotting; weak light can slow recovery after root disturbance.
- Recent stress: Check whether the plant has already faced drooping, yellowing, or handling stress; delaying may reduce added pressure on the plant.
- Watering state: Check whether the potting medium is workable rather than very dry or wet; poor moisture balance can make root handling harder.
- Recovery window: Check whether aftercare can stay steady for the recovery period, including drainage, humidity, and limited handling.
Emergency repotting may be safer when soil failure, wet soil, or drainage problems create a higher root-zone risk than waiting. If the plant is only mildly stressed and the potting medium still works, delaying repotting until conditions are more stable may be the better decision.
This chart shows the key checks and decision outcomes for repotting an indoor tropical plant based on seasonal timing and recovery conditions.
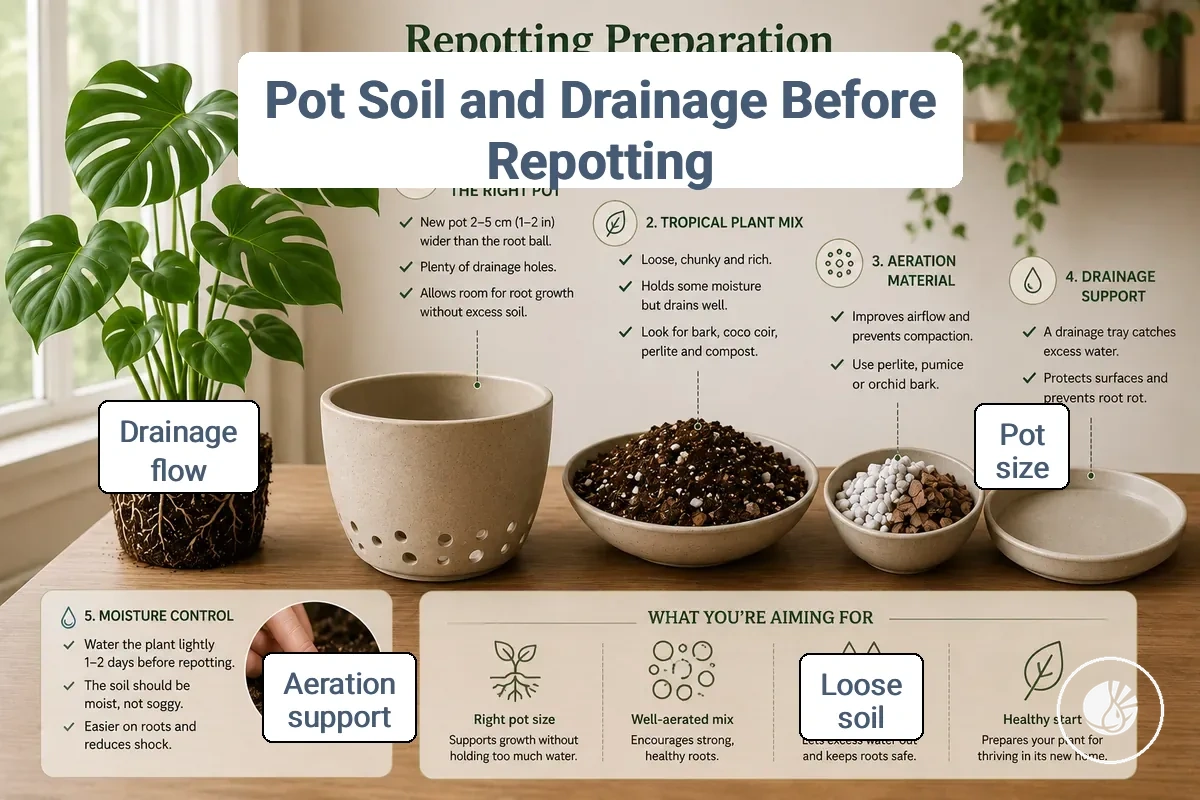
Pot, soil and drainage choices before repotting
A poor potting setup can increase root stress even when repotting is done carefully. Before moving an indoor tropical plant, the pot, soil, and drainage choices should work together to support root safety, moisture control, and recovery. The main condition to check is whether the setup matches the plant's root mass, plant type, and indoor watering behavior.
| Entity/part | Attribute/criterion | Value/condition | Effect/risk/decision |
|---|---|---|---|
| Pot | Pot size | Matched to current root mass | Can improve watering control and reduce excess moisture risk. |
| Pot | Drainage opening | Allows water to exit freely | Supports drainage and may reduce prolonged wet conditions around roots. |
| Soil | Soil texture | Balanced for moisture and airflow | Can help maintain a healthier root zone. |
| Tropical plant soil mix | Aeration | Contains aeration material that improves air movement | May reduce compaction and support root safety. |
| Potting setup | Moisture retention | Aligned with indoor watering habits | Can help prevent soil from staying too dry or too wet. |
| Drainage support | Water movement | Allows excess moisture to leave the pot | May improve watering control and recovery conditions after repotting. |
Pot size and soil composition depend on plant condition rather than a single rule. A tropical houseplant with a dense root zone may need different moisture retention and aeration characteristics than one with lighter root growth. If watering consistency is difficult to maintain, the potting medium may need adjustment before repotting begins.
When the setup requires more detailed evaluation, the decision should remain based on root condition, moisture behavior, and drainage performance rather than product selection alone. Additional criteria can be explored through soil, potting and drainage setup when comparing suitable preparation options.
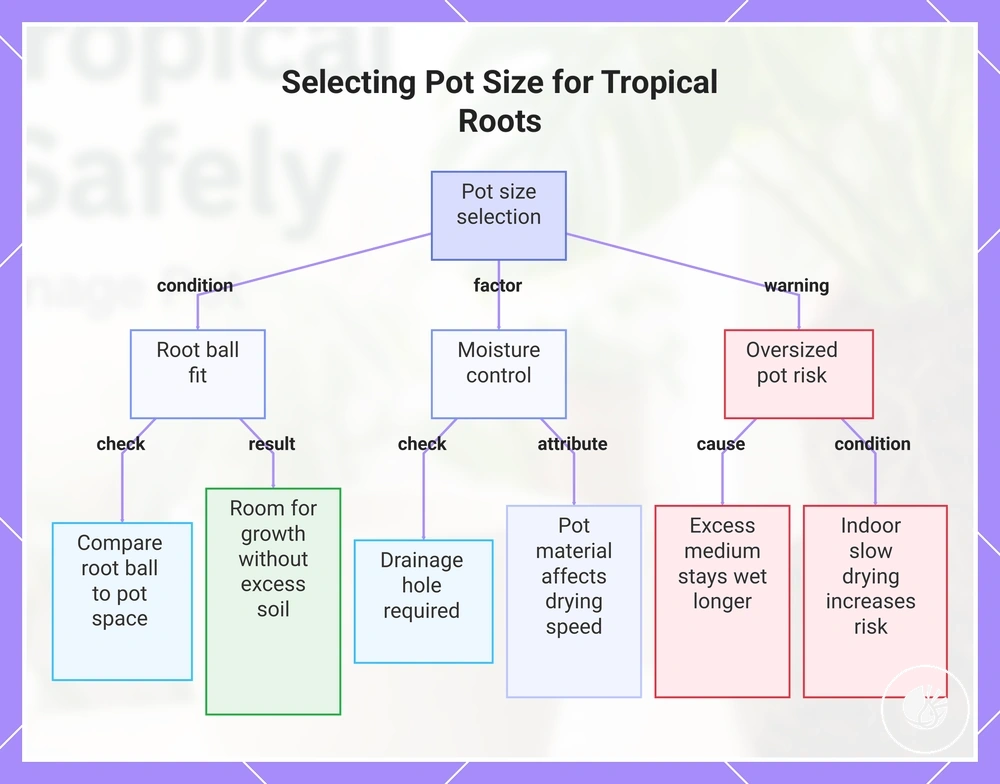
Choosing a pot size that protects tropical roots
Choosing the wrong pot size can increase wet soil risk or limit root recovery after repotting. A suitable pot size balances root room with moisture control so the root zone can adjust without unnecessary stress. The main condition to check is how the current root ball relates to available space and drying speed after watering.
- Root ball size: Compare the root ball to the new pot space; root room should support growth without leaving excessive unused soil.
- Diameter increase: A modest diameter increase may support recovery, while a larger increase can hold more moisture than the roots can use.
- Drainage hole: Check that the pot includes a drainage hole; water movement becomes more important as pot volume increases.
- Pot material: Pot material may influence drying speed and moisture behavior, which can affect pot size decisions.
- Watering risk: If wet soil persists for long periods after watering, pot size and moisture retention may not be balanced.
A slightly larger pot can provide additional root room while keeping moisture behavior easier to manage. An oversized pot may increase overpotting risk because excess potting medium can remain wet longer, especially when root density is low or indoor drying speed is slow.
Pot size decisions depend on plant maturity, root density, and indoor conditions rather than a fixed sizing rule. If moisture remains balanced and the root ball has enough room to recover, the chosen pot size is more likely to support a smoother recovery period.
This chart shows the key checks, factors, and risks to consider when choosing a pot size that supports tropical root recovery and moisture balance.
Using a loose tropical soil mix for airflow and drainage
A loose tropical plant soil mix supports airflow and drainage by reducing compaction and helping moisture move more evenly through the root zone after repotting. This texture can improve root oxygen access while balancing moisture retention during the recovery period. The main condition to check is whether the soil texture stays open enough to support both drainage and root safety.
- Tropical plant soil mix: A loose texture may help the potting setup balance airflow, moisture retention, and drainage.
- Aeration: Materials that create air spaces can support root oxygen movement and reduce compaction risk.
- Organic matter: Organic components may help retain moisture while still allowing water movement through the soil.
- Drainage support: Soil structure should allow excess moisture to move through the pot without remaining trapped for extended periods.
- Watering response: If soil stays dense or dries unevenly, texture may not match the plant's moisture needs.
Soil mix, texture, aeration, and compaction risk work together. A tropical houseplant may respond better to a potting medium that feels loose and crumbly rather than dense and tightly packed. This texture-based example illustrates how open soil structure can support drainage while helping maintain more predictable moisture behavior.
No single mix suits every plant condition. Root density, indoor humidity, watering habits, and drying patterns can influence which texture performs well. If the soil remains open, supports drainage, and avoids heavy compaction, the chosen mix is more likely to support healthy recovery after repotting.
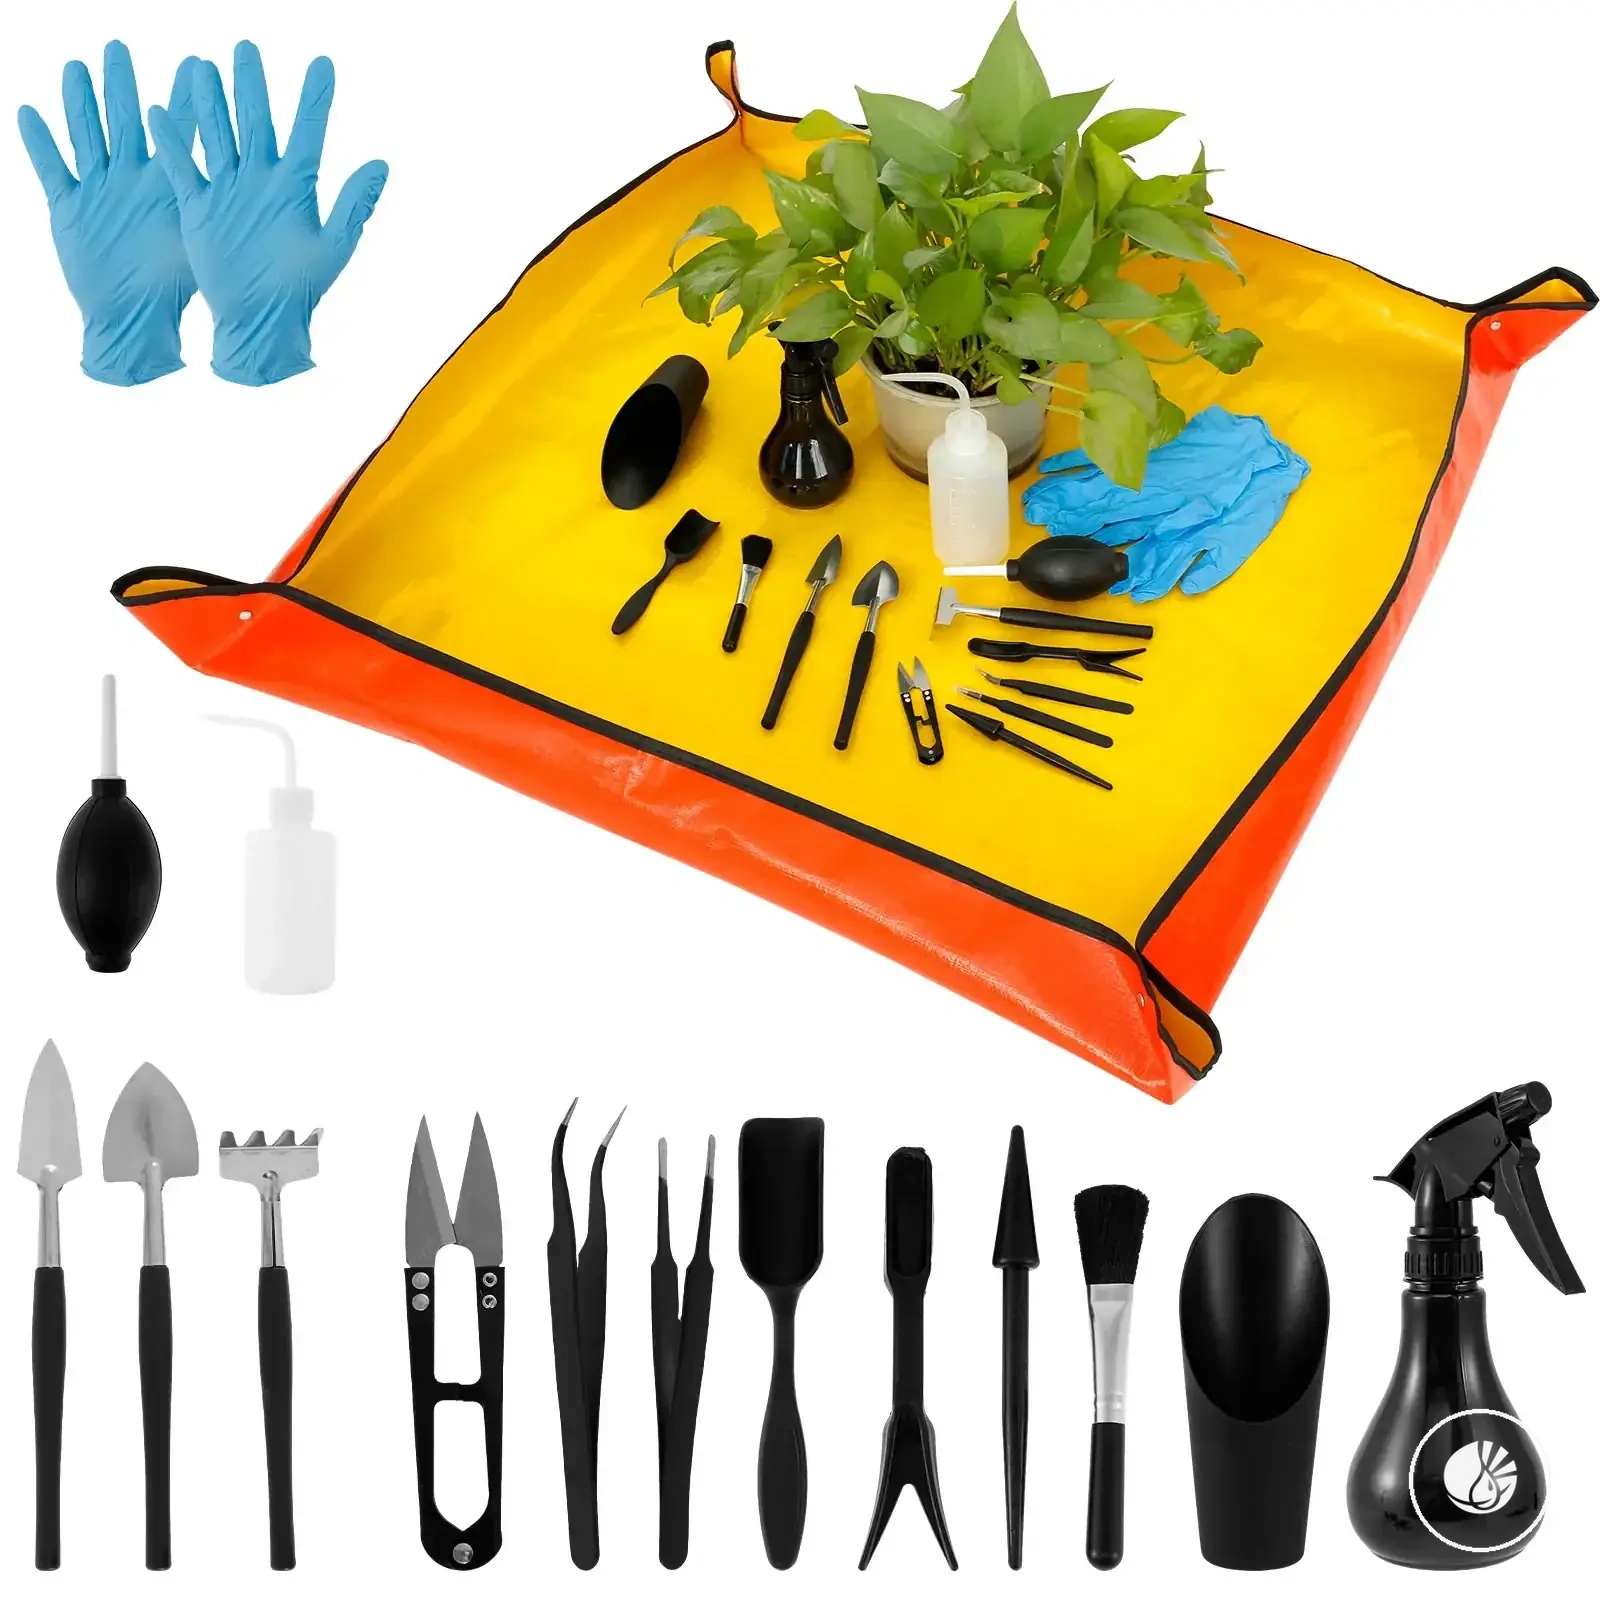
Repotting tools that reduce mess and root damage
Repotting tools support cleaner handling by helping manage soil movement, root access, and drainage preparation during indoor tropical plant repotting. The most useful setup depends on how much root handling and potting adjustment the plant requires. The main condition to check is whether the root zone can be managed with minimal disturbance while maintaining effective mess control.
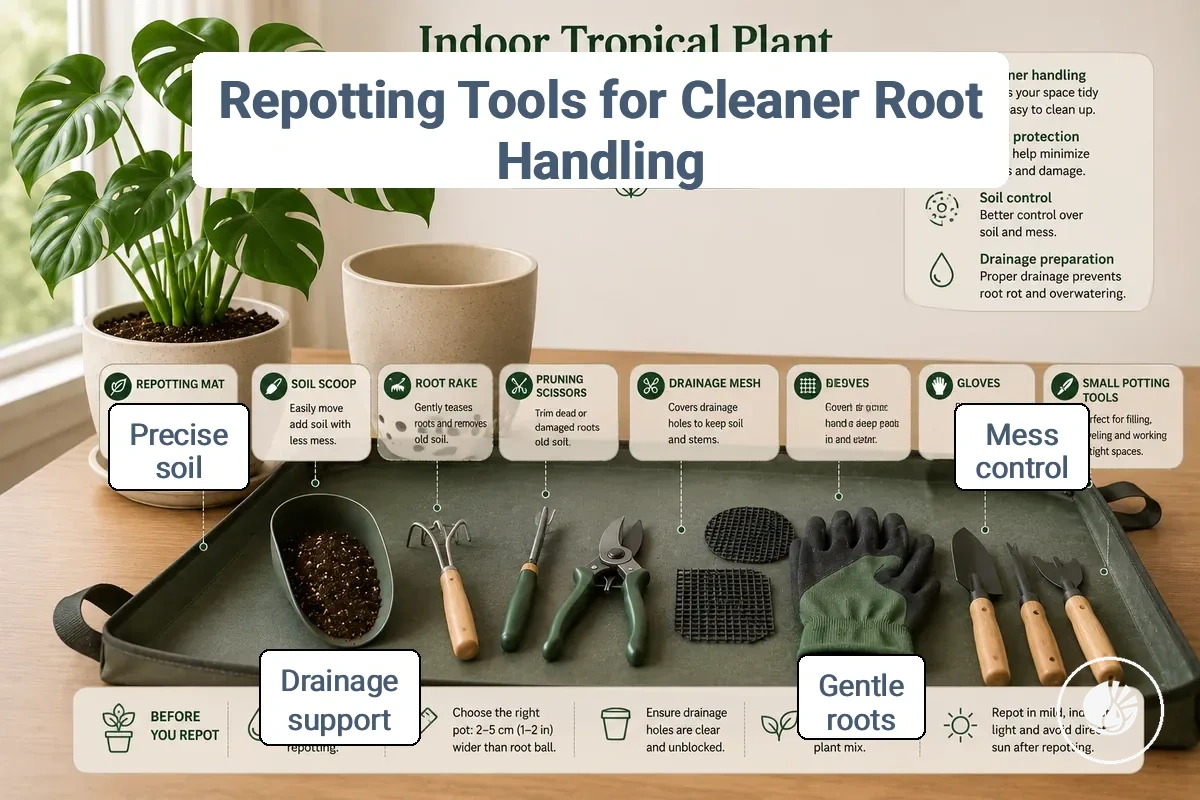
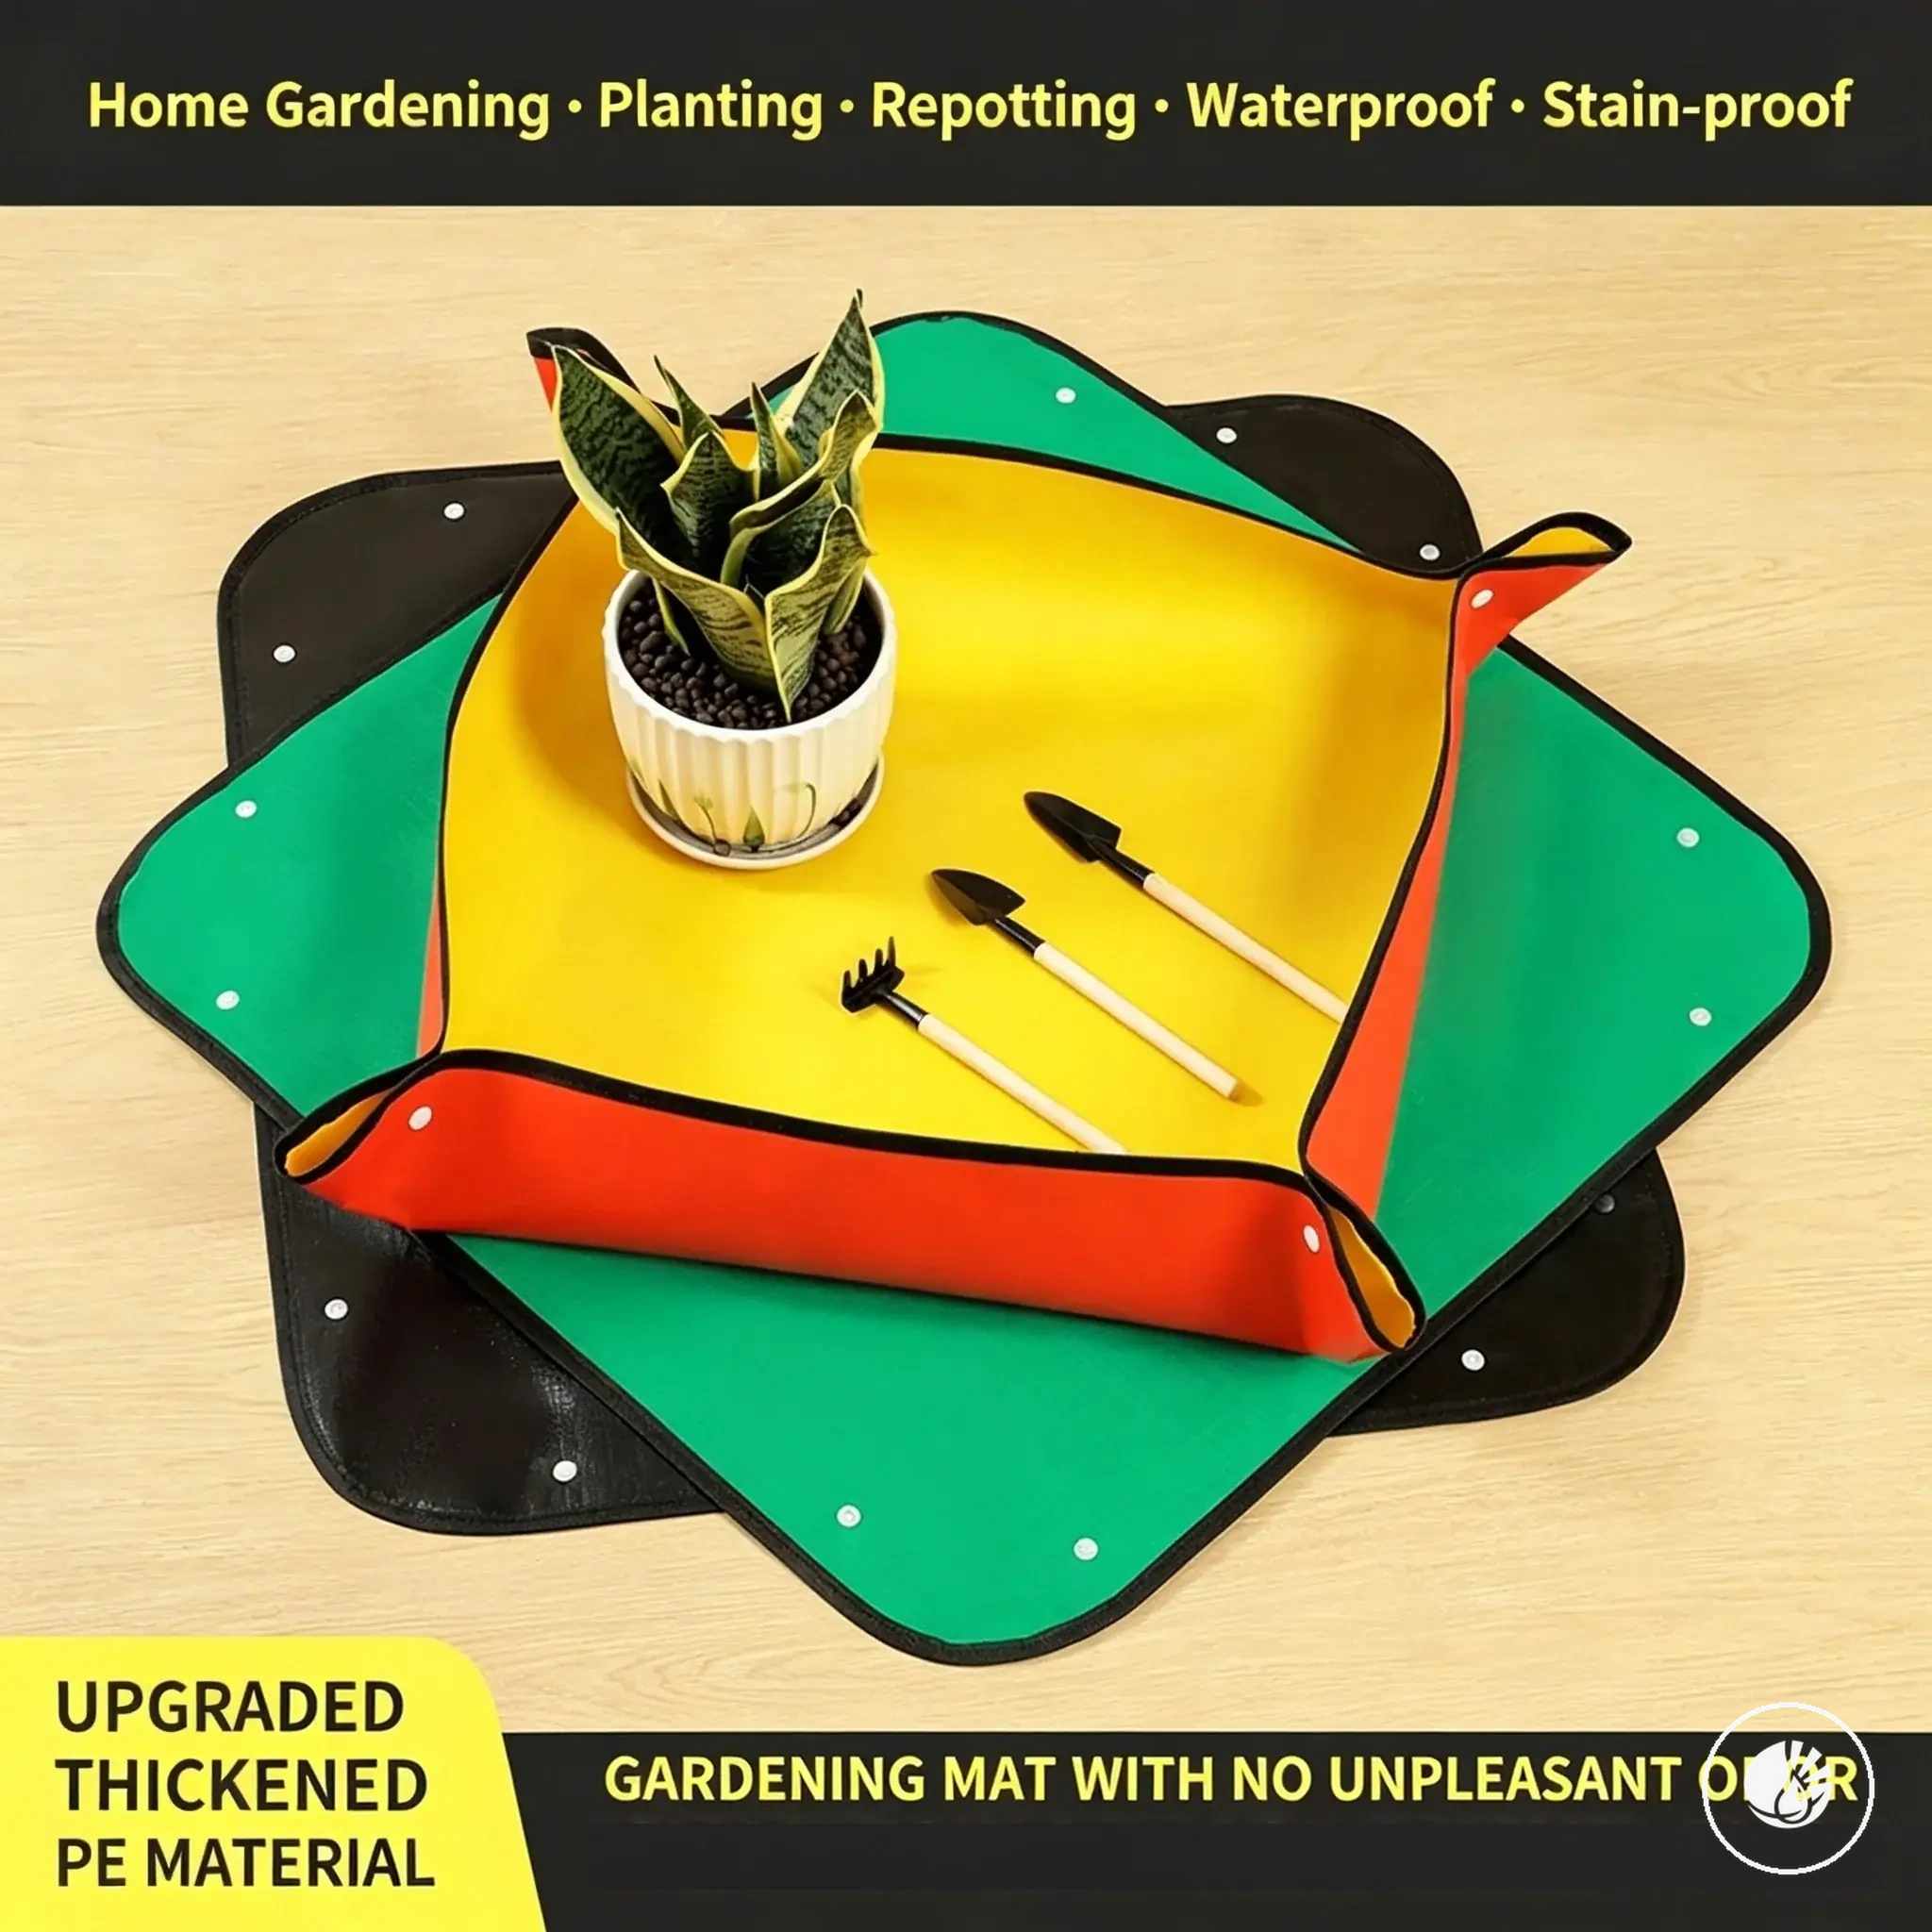
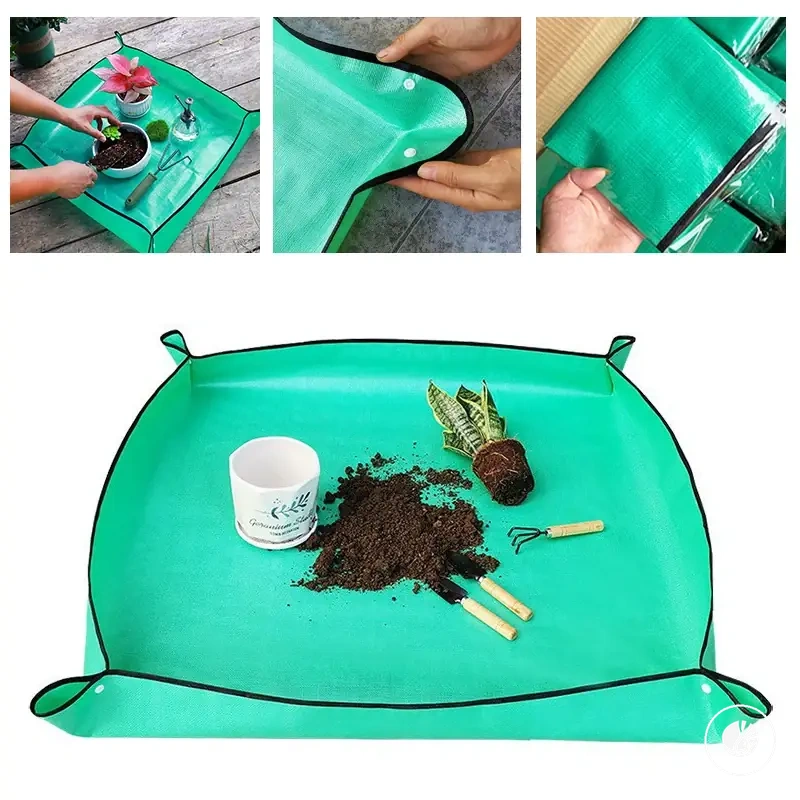
- Repotting mat: Collects loose soil and potting medium during handling → reduces mess control issues and simplifies cleanup.
- Scoop: Places soil into the pot with greater precision → reduces unnecessary soil spills and root disturbance.
- Root rake: Helps separate compacted roots when inspection is needed → may reduce root damage caused by forceful pulling.
- Pruning scissors: Allows controlled trimming of damaged root material when appropriate → may reduce stress from rough handling.
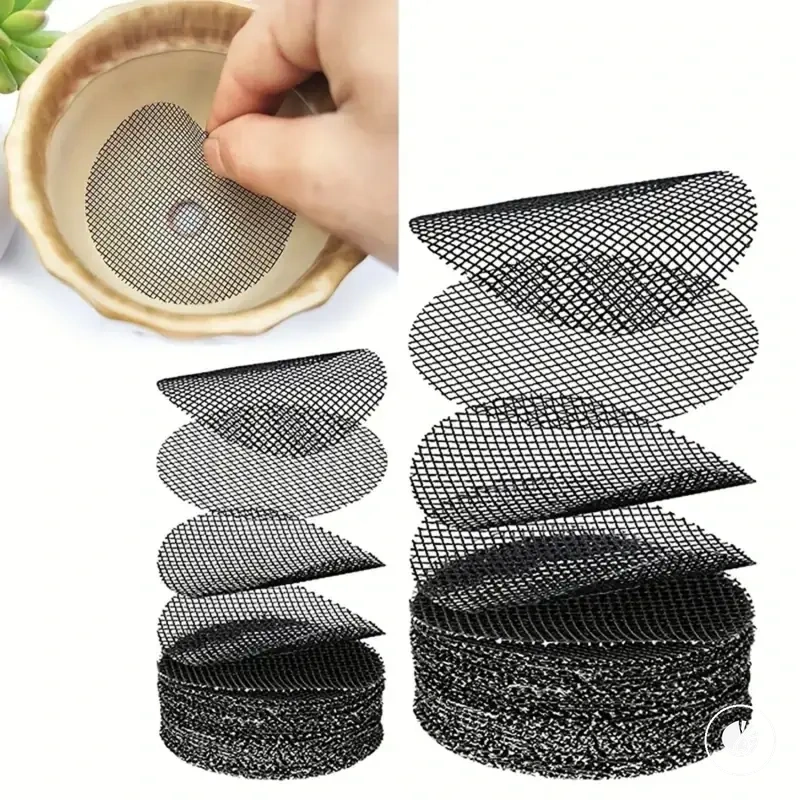
- Drainage mesh: Covers drainage openings while allowing water movement → helps retain potting medium without restricting drainage support.
- Gloves: Improve grip during plant handling → may reduce accidental root or stem damage.
- Potting tools: Assist with soil placement and root-zone adjustments → can improve control in confined pot spaces.
A simple setup may be enough when roots separate easily, the soil remains loose, and drainage preparation is straightforward. Extra repotting tools can improve control when roots are dense, the potting medium is compacted, or workspace cleanup is more difficult.
Tool selection is most useful when matched to the level of root handling and drainage preparation required. If repotting conditions become more demanding, additional guidance may be found through repotting tools and care kits.
How to repot an indoor tropical plant
How to repot an indoor tropical plant starts with preparing the plant, potting mix, and work area before disturbing the root ball. The safest approach depends on plant condition, soil moisture, and how tightly the roots occupy the pot.
Repotting can become more difficult when the root ball is compacted, the old soil is heavily settled, or the plant is already stressed. A clear sequence helps reduce unnecessary root disturbance and supports consistent drainage in the new potting setup. The visual below shows how to repot an indoor tropical plant from removal through final settling.

- Prepare the plant and work area: Place the indoor tropical plant on a stable surface and prepare the fresh potting mix and new pot. If the soil is extremely dry or saturated, handling may become more difficult.
- Remove the plant from the pot: Support the root ball and ease the plant out carefully. If roots cling to the container, avoid force that may increase root damage.
- Inspect the root ball and old soil: Check root density and soil condition. If old soil separates easily, remove only what loosens naturally rather than disturbing the root zone aggressively.
- Address damaged roots when needed: Remove damaged root material only when it is clearly affected. If the root ball appears healthy and stable, limit unnecessary root removal.
- Add fresh mix and position the plant: Place fresh mix in the new pot and set the root ball at an appropriate pot depth. Avoid placing the plant significantly deeper if the current planting level remains suitable.
- Fill and settle the potting mix: Add potting mix around the root ball and firm it lightly. If the mix becomes heavily compacted, drainage and root-zone airflow may be reduced.
- Check final settling: Confirm that the plant is stable, the root ball is supported, and drainage pathways remain open. If the plant shifts easily, adjust the surrounding mix before finishing the process.
Preparing the plant and work area
Preparing the plant and work area starts with organizing the indoor tropical plant, potting mix, and workspace before the root ball leaves the pot. The goal is to support gentle handling and reduce unnecessary disturbance during removal, especially when plant condition or soil moisture may affect the process.
A disorganized work area or missing materials can interrupt handling and make root-ball removal less controlled. Checking the workspace, drainage preparation, and plant stability before lifting helps keep the process orderly and focused. Complete the preparation checks below before moving to the removal stage.
- Check watering state: Verify that the soil is workable rather than extremely dry or saturated, as moisture condition can affect root ball stability.
- Prepare a clean surface: Clear enough space for the plant, old soil, and fresh mix to reduce interruptions during handling.
- Place nearby materials: Keep the new pot, potting mix, and drainage support ready so the root ball can be transferred without delay.
- Verify pot readiness: Check that the new pot is prepared and able to receive the plant immediately after removal.
- Confirm plant stability: Position the indoor tropical plant where it can be lifted with control and gentle handling.
- Support fragile growth when needed: If the plant is large, trailing, or fragile, provide temporary support before lifting to reduce strain during movement.
Removing the plant without tearing the root ball
Removing the plant without tearing the root ball starts with loosening the pot before lifting the indoor tropical plant. The root ball should be released gradually when pressure, moisture, and root attachment allow safe movement.
Resistance between the pot, old soil, and root ball can make removal difficult. Pulling harder is not the solution when the plant does not move. Instead, reduce resistance step by step and check how the root ball responds before continuing.
- Loosen the pot sides: Squeeze a flexible pot or gently press around the sides when the pot material allows it. Avoid excessive pressure that could damage the pot or disturb the root ball.
- Free the edge of the potting mix: Loosen areas where old soil attaches to the pot wall. If the potting mix remains firmly attached, work slowly rather than forcing separation.
- Support the plant at the base: Hold the indoor tropical plant close to the root ball while supporting the container. Avoid lifting by stems or foliage because the force is not directed through the root zone.
- Release the root ball gradually: Tip the pot and guide the root ball outward. If movement stops, pause and check for attached roots or compacted areas before applying more pressure.
- Check resistance signals: Roots near drainage openings or along the pot wall may limit movement. When resistance increases, inspect the attachment point instead of pulling harder.
- Handle stuck plants carefully: If the root ball remains stuck, light tapping or careful pot cutting may be appropriate when the container can be sacrificed. This approach can reduce the risk of tearing roots compared with forceful removal.
Loosening old soil and trimming damaged roots
Loosening old soil and trimming damaged roots starts with separating only what interferes with healthy recovery. The amount of cleaning depends on the root ball condition, old soil attachment, and the need for fresh potting mix to settle around the roots.
Compacted pockets of old soil can limit contact between the root ball and fresh mix, while excessive cleaning can remove more root support than necessary. The goal is to loosen first and trim only when visible damage exists. The checklist below separates helpful root care from unnecessary disturbance during indoor tropical plant repotting.
Healthy roots are usually firm and intact. Dead or mushy roots should be removed, while tightly circling roots may need careful evaluation when they restrict natural growth. Use gentle handling throughout the process and avoid treating aggressive root washing or heavy pruning as a default method.
- Do: Loosen old soil that separates naturally from the root ball.
- Do: Use a root rake carefully when compacted pockets limit access to the root structure.
- Do: Remove clearly dead or mushy roots with pruning scissors when damage is visible.
- Do: Check circling roots individually before deciding whether trimming is necessary.
- Do not: Remove all old soil when the root ball remains stable and healthy.
- Do not: Treat root washing as a required step for every indoor tropical plant.
- Do not: Trim healthy roots without a clear reason.
- Do not: Prune heavily when only minor root adjustment is needed for drainage and fresh potting mix placement.
Settling the plant into fresh mix and drainage
Settling the plant into fresh mix and drainage starts with positioning the root ball at the correct height before adding more potting mix. The stem base should remain at a suitable planting depth while the root ball stays stable inside the pot.
Poor placement can leave the root ball unstable or reduce contact between roots and fresh mix. Deep burial can create risk around the stem base, while heavy compaction can limit air movement through the potting mix. Follow the steps below to establish stable placement before moving to later stages of recovery.
- Create a base layer: Add enough fresh potting mix to support the root ball. Check the root ball height before placement and avoid raising or lowering the stem base unnecessarily.
- Position the root ball: Place the root ball in the center of the pot. Keep the stem base near its previous planting level and avoid burying it too deeply.
- Fill around the root ball: Add fresh mix around the sides so it contacts the root ball evenly. If gaps remain, add more mix gradually rather than forcing it into place.
- Firm the mix gently: Use gentle handling to settle the potting mix around the roots. Avoid heavy pressure that can compact the mix and reduce airflow.
- Check drainage holes: Confirm that potting mix does not block the drainage holes. Clear openings help maintain water movement through the pot.
- Verify final stability: Check that the indoor tropical plant sits upright and the root ball remains supported. Confirm that water can move through the pot and that the plant stays stable in its final position.
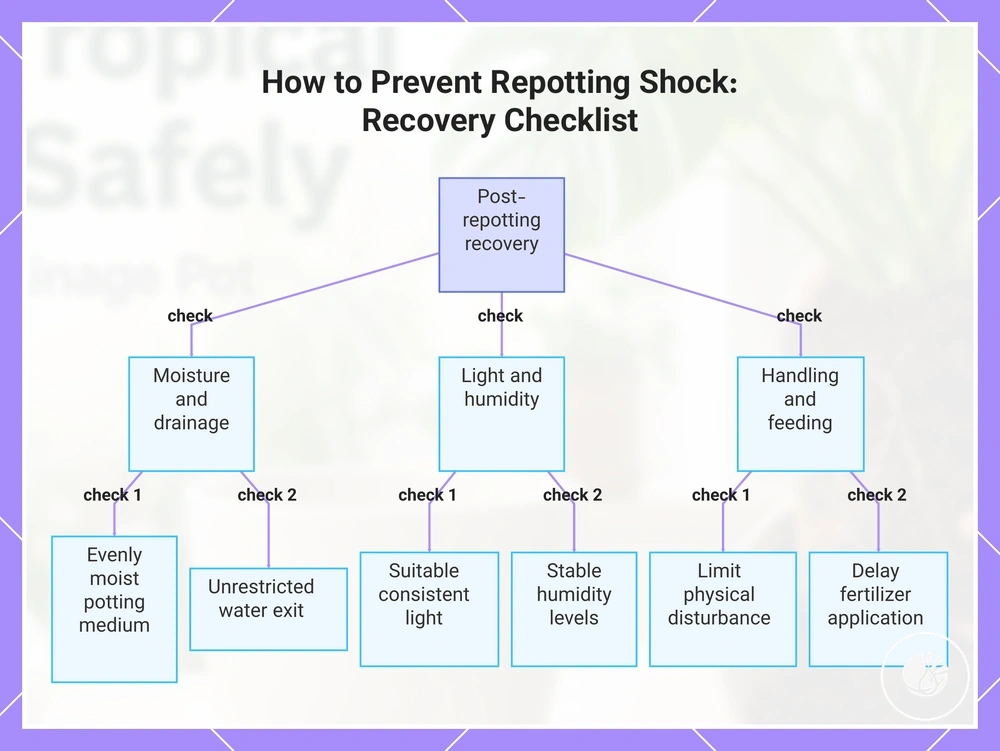
Aftercare that prevents repotting shock
After repotting, a tropical houseplant may show mild stress while roots adjust to the new potting medium. Recovery often depends on how watering, drainage, light, humidity, and handling are managed during the recovery period. The main condition to check is whether the plant is stabilizing rather than showing increasing stress.
Short-term drooping or slower growth does not automatically indicate repotting shock. Plant condition, moisture balance, drainage performance, and pot size can all influence recovery. Decisions are usually more reliable when based on multiple recovery signals rather than a single symptom.
The recovery checklist below organizes the main conditions that influence root adjustment and overall plant stability. Each check connects a care condition to a possible recovery effect or shock risk.
- Watering: Verify that the potting medium remains evenly moist rather than constantly wet or extremely dry. Balanced moisture can support recovery and reduce root stress.
- Drainage: Check that excess water can leave the pot. Restricted drainage may increase root-zone risk during recovery.
- Light: Confirm that light exposure remains suitable and consistent. Sudden light changes can increase adjustment stress.
- Humidity: Check for stable humidity conditions. Large fluctuations may slow recovery in some situations.
- Handling: Limit unnecessary movement or repeated repositioning. Reduced handling can help the plant focus on root adjustment.
- Fertilizer delay: Consider delaying fertilizer until the plant shows signs of settling into the new environment. Early inputs may not suit every recovery period.
- Touch frequency: Avoid frequent root-zone checks or repeated soil disturbance. Excessive interaction can interrupt recovery progress.
If recovery remains steady, observation is often more useful than frequent care changes. When conditions vary or symptoms persist, compare moisture, drainage, light, and handling together before changing the care approach. For a broader recovery review, use the maintenance checklist after repotting.
The products below are useful examples for comparing available options. Before buying, check that the compatibility criteria, key features, and product details match your needs.
This chart shows the key care conditions and handling practices to check during post-repotting recovery to support root adjustment and avoid shock.
First watering and drainage after repotting
First watering after repotting starts with applying enough water to help the potting medium settle around the root zone while verifying that the new setup drains correctly. The amount depends on pot size, mix type, and plant condition. The main condition to check is whether water moves through the pot and exits without leaving the root zone excessively wet.
Soil settling and root contact often improve when the first watering is applied gradually rather than according to a fixed schedule. If water remains on the surface, drains very slowly, or leaves the potting medium saturated for an extended period, drainage behavior may need closer evaluation. Poor drainage after repotting is a setup signal as well as a watering signal.
- First watering: Apply water gradually so the potting medium settles around the roots. This can reduce air gaps that may limit root contact.
- Drainage flow: Check that water exits through the drainage holes. Visible flow helps verify that excess moisture has a path out of the pot.
- Soil settling: Verify that the potting medium settles evenly after watering. This can reduce unsupported spaces around the root ball.
- Saucer water: Empty collected water after drainage slows. Standing water may keep the lower root zone wetter than intended.
- Moisture check: Assess moisture before adding more water. Recovery needs can vary by plant condition and pot size.
- Pot drainage behavior: Observe how water moves through the setup. Slow drainage may indicate a condition involving the mix, pot size, or drainage pathway.
- Drainage mesh: Confirm that drainage mesh, when used, allows water movement without blocking drainage openings. This can reduce drainage restriction risk.
- Repotting mat: Use for mess control during watering cleanup so drainage checks remain easier to observe.
- Scoop: Use only if additional potting medium is needed after soil settling. This can reduce unnecessary disturbance to the root zone.
- Root rake and pruning scissors: Avoid further root work during the first watering unless a clear issue is identified. Limiting extra handling may reduce root damage risk during the recovery period.
Light, humidity and handling during root recovery
When a tropical houseplant has been repotted, a stable recovery environment can help the roots adjust to the new potting medium with less stress. Indirect light, humidity stability, and limited handling are often more helpful than making multiple environmental changes during the recovery period. The main condition to check is whether the recovery environment remains consistent while the root zone settles.
Recovery depends on more than one condition. Watering and drainage support root-zone function, while light, humidity, and handling influence how much additional stress the plant experiences. If conditions change frequently, recovery may become less predictable and repotting shock risk may increase.
- Indirect light: Verify that light remains stable and suitable for the plant. Consistent light can reduce adjustment stress during recovery.
- Humidity stability: Check that humidity remains reasonably consistent. Large shifts may increase moisture-related stress.
- Temperature: Maintain a stable room environment. Significant temperature changes can affect recovery conditions.
- Airflow: Confirm that airflow is gentle rather than excessive. Strong airflow may increase moisture loss from the plant and potting medium.
- Handling frequency: Limit unnecessary movement, rotation, or repositioning. Reduced handling can help the plant focus on recovery.
- Fertilizer delay: Consider postponing fertilizer until the plant appears more settled in the new setup. Fewer changes can make recovery conditions easier to evaluate.
If the plant was recently moved from low light, a dry room, or another stressful environment, adjust conditions gradually and only when a clear reason exists. The next action should reflect the plant's condition and recovery response rather than a fixed routine.
Repotting shock symptoms and recovery time
When drooping, yellowing, or stalled growth appears after repotting, mild repotting shock may be part of the adjustment process, while worsening symptoms usually indicate that a condition needs checking. Temporary changes can occur as roots adapt to the new potting medium. The main condition to check is whether each symptom is stabilizing or becoming more severe during the recovery period.
Recovery time depends on symptom severity, root disturbance, moisture conditions, and drainage performance. A single symptom does not always identify the cause, so comparing visible plant changes with root-zone and soil conditions can support a better recovery decision.
| Symptom | Likely condition | Check | What it means |
|---|---|---|---|
| Drooping | Root disturbance or moisture imbalance | Check root-zone moisture and plant stability | Temporary adjustment may be occurring, but worsening drooping needs further review |
| Yellowing | Stress response or wet soil condition | Check drainage and potting medium moisture | Persistent yellowing may indicate that recovery conditions need adjustment |
| Leaf curl | Recovery stress or environmental change | Check humidity, light, and handling conditions | The plant may be responding to stress while adapting |
| Stalled growth | Root recovery activity | Check overall plant condition rather than growth alone | Paused growth can occur while roots adjust to the new setup |
| Wet soil | Slow drainage or excess moisture retention | Check drainage flow and pot conditions | Poor drainage may increase recovery risk if moisture remains excessive |
| Root disturbance | Recent root handling during repotting | Check whether symptoms are improving or worsening | Recovery may take longer when roots were disturbed during repotting |
If symptoms continue to worsen instead of stabilizing, compare moisture, drainage, and root-zone conditions before making additional changes. For more specific guidance on drooping after repotting, use symptom patterns together with overall recovery conditions to support the next decision.
Repotting mistakes that weaken indoor tropical plants
Repotting mistakes that weaken indoor tropical plants usually involve root stress, poor drainage, or unstable recovery conditions. The main condition to check is whether the mistake affects root safety, moisture movement, or the plant's ability to settle after repotting.
Minor handling errors may only need observation, while mistakes that keep the root zone wet, buried, compacted, or heavily disturbed may need correction. The table below separates each mistake by root or drainage risk and the safer correction.
| Mistake | Root or drainage risk | Correction |
|---|---|---|
| Overpotting | Extra potting medium can hold more moisture than the roots can use, increasing wet soil risk. | Use a pot size that matches the current root ball and supports controlled watering. |
| Compact mix | Dense soil can restrict airflow and slow drainage around the root zone. | Choose a looser potting medium that supports drainage and root contact without heavy compaction. |
| Poor drainage | Water may remain around the roots longer than the plant can tolerate. | Check drainage holes, drainage pathway, and mix texture before assuming watering alone is the issue. |
| Heavy pruning | Removing too much healthy root material can increase recovery stress. | Trim only clearly damaged roots and keep healthy root structure as intact as possible. |
| Fertilizing too soon | Adding inputs during early recovery can make plant response harder to judge. | Delay fertilizer until the plant appears more stable in the new potting setup. |
| Deep planting | Burying the stem base too deeply can create moisture and stability problems. | Keep the plant near its previous planting depth unless the root ball position requires minor adjustment. |
| Rough handling | Pulling, tearing, or shaking the root ball can increase root disturbance. | Use gentle handling and loosen resistance before moving or positioning the plant. |
| Overwatering | Excessive watering can keep the potting medium wet and slow recovery. | Check moisture and drainage behavior before adding more water. |
A small soil spill or brief handling pause may not require correction if the plant remains stable. A mistake is more urgent when it changes moisture behavior, blocks drainage, buries the stem base, or causes visible root damage.